
Pool Tile: Test Deposits Before Acid, Clean Without Draining
Yes, most waterline tile cleaning jobs can be finished without fully draining your pool. Lower the water a few inches to expose the band, test the deposit to find out what you're dealing with, then apply the right cleaner and tool before refilling and rebalancing the water. Weekly wiping and enzyme treatments cut down how often you need to do the heavy scrubbing at all.
TL;DR:
- Test the deposit on a hidden spot: carbonate fizzes with diluted acid, while silicate usually does not and needs mechanical removal or professional help.
- Avoid acid and pumice on glass mosaic, polished stone, or vinyl; use enzyme cleaners or nonabrasive degreasers instead, and seek professional help for heavy deposits.
- Lower the water a few inches, work in sections of about 3–4 feet, and follow label dwell times; test pH and alkalinity 24 hours later.
- A weekly wipe takes about 90 seconds with an enzyme cleaner or mild degreaser; monthly brushing and pH checks help prevent deposits from returning.
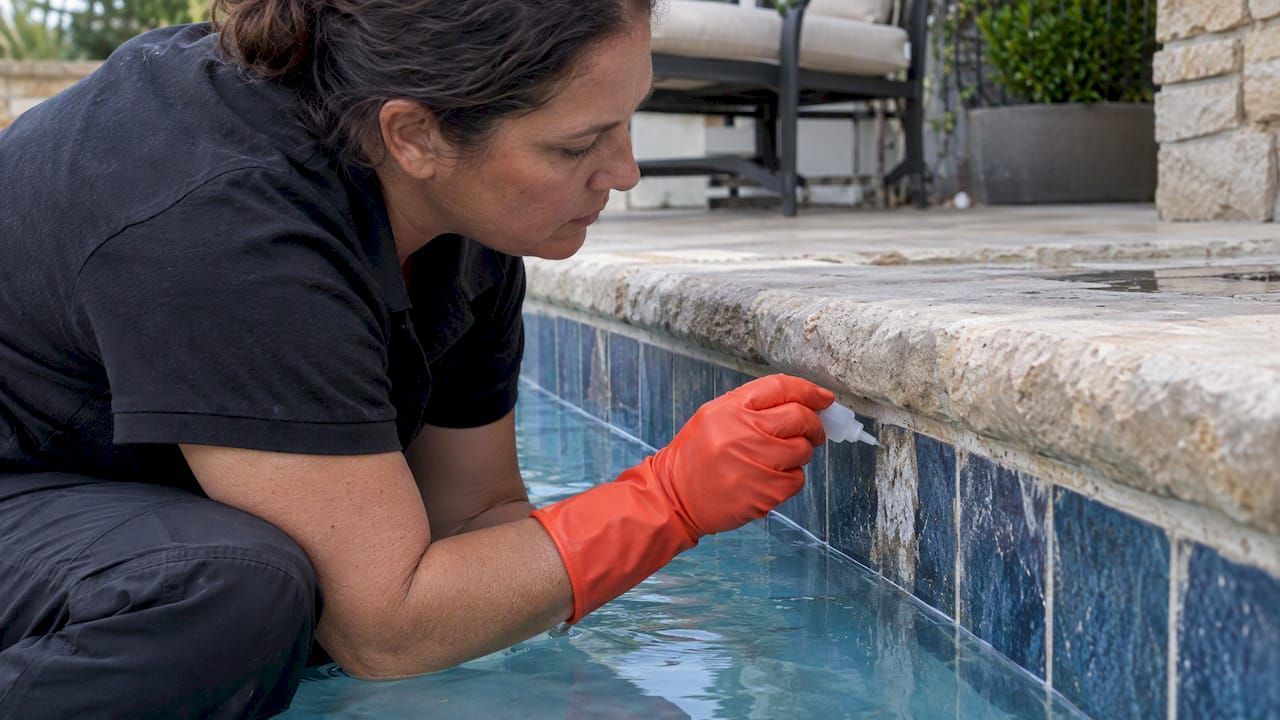
Table of Contents
- What Causes Tile Waterline Buildup and Why Diagnosis Matters
- How to Identify the Deposit Safely Before You Treat It
- Tools and Cleaners That Work Without Draining the Pool
- Step-by-Step Workflow for Cleaning Waterline Tile Without Draining
- Aftercare: Rebalancing Water and Protecting Tile After Cleaning
- Routine Maintenance Plan to Prevent Future Waterline Scale
- Eco-Friendly Product Guidance for a Safer Cleaning Routine
- A Practitioner's Note on Common Mistakes
- Where to Find Eco-Friendly Cleaners and Sealers
- FAQ
- Sources
What Causes Tile Waterline Buildup and Why Diagnosis Matters
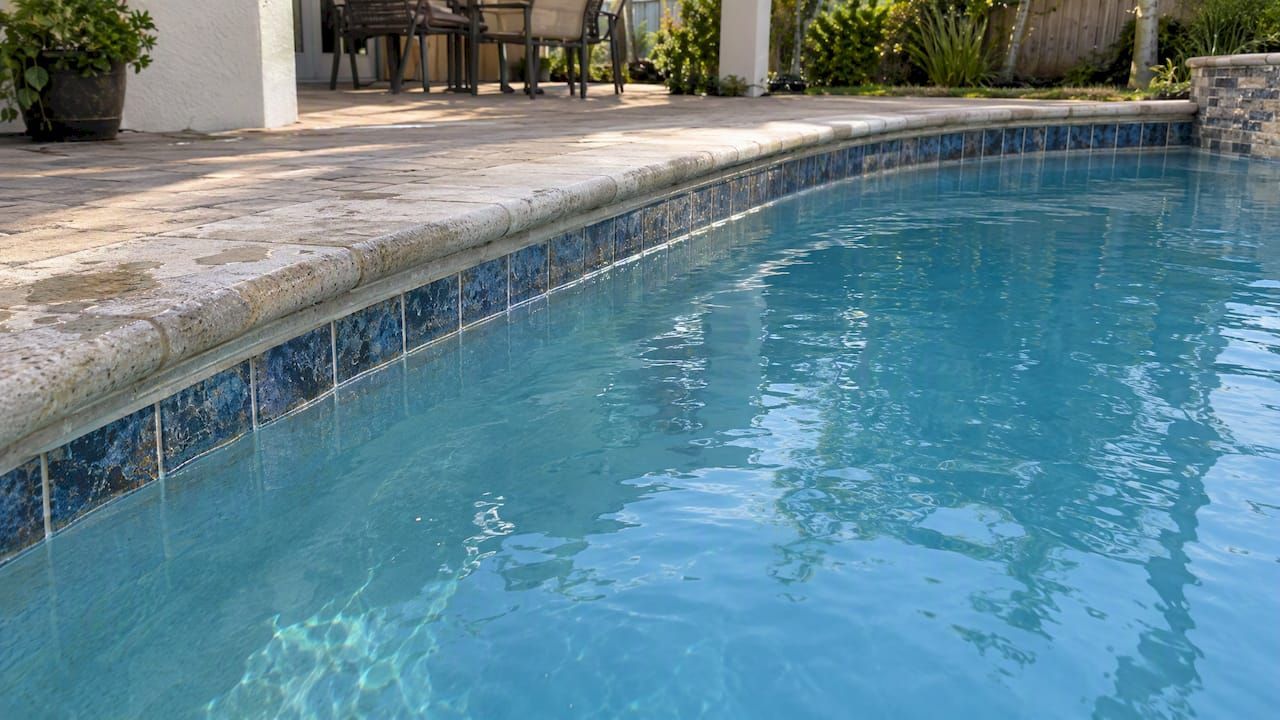
The grimy band at your pool's waterline is rarely one single substance. It is usually a mix of minerals and body oils that bond together over weeks of sun exposure and evaporation, and the mix determines which cleaning method will actually work.
Three deposit types show up most often:
- Organic scum : an oily film from sunscreen, lotion, and body oils that feels greasy and often has a dull, grayish look.
- Calcium carbonate : a chalky white deposit that forms when pH and alkalinity run high, pulling calcium out of solution and onto the tile surface.
- Calcium silicate : a harder, grayish-white deposit that bonds more tightly to the tile and does not respond to acid the way carbonate does.
High pH, evaporation, hard fill water, and sunscreen oils work together to create this buildup. As water evaporates, dissolved minerals concentrate near the surface, and elevated pH pushes calcium out of solution faster than it would at a balanced reading. Oils left on the tile act like glue, trapping the mineral particles before they can be filtered out. That is why a pool with consistently high pH or hard source water tends to develop scale bands faster, even with regular skimming.
Cleaning the tile without addressing the water chemistry behind it is a temporary fix. If the pH and calcium hardness that caused the deposit stay out of range, the band comes back within weeks. Scrubbing treats the symptom; rebalancing treats the cause, and the two need to happen together for the work to stick.
Knowing which type of deposit you're facing also protects your tile. Acid dissolves calcium carbonate efficiently, but it does nothing for silicate scale and can etch grout or stonework if applied without a clear reason. A quick diagnosis before you reach for any product saves time and protects the surface you're trying to clean.
How to Identify the Deposit Safely Before You Treat It
A short diagnostic routine tells you whether you're dealing with something acid will dissolve or a deposit that needs mechanical work instead. Skipping this step is how DIYers end up over-applying acid to a surface that was never going to react to it.
- Pick an inconspicuous test spot on the tile band, ideally a few inches where the deposit looks representative of the rest of the line.
- Put on gloves and eye protection , then apply a small drop of diluted acid or a scale-dissolving gel to the test spot.
- Watch for fizzing. A visible fizz or bubbling reaction means you're looking at calcium carbonate, which acid-based cleaners and scale removers will break down effectively.
- No reaction usually means calcium silicate or another non-acid-soluble deposit, which calls for mechanical removal rather than more acid.
- Rinse and neutralize the test spot immediately, then wait roughly 24 hours and inspect for etching, dulling, or color change before treating the full band.
- If the spot test shows no damage , try a wet pumice stone on a small section as a secondary check, since pumice handles light to moderate carbonate scale well on many standard tile types.
Pumice needs to stay wet at all times during this test and during any later use. A dry pumice stone, or one allowed to dry out mid-use, will scratch the glaze. Pumice and acid testing are also not appropriate for every surface: avoid both on glass mosaic tile, polished natural stone, or vinyl liners, where even a mild abrasive can leave permanent marks. If your pool has any of these finishes, skip straight to enzyme or non-abrasive degreaser options and consider professional evaluation for heavier deposits.
Heavy, long-standing silicate buildup often will not respond to acid or pumice at all. When a deposit survives both the fizz test and a careful pumice trial, professional bead blasting or tile replacement is typically the next step rather than escalating to stronger chemicals.
Tools and Cleaners That Work Without Draining the Pool
You don't need professional equipment to tackle most waterline buildup. A short list of gentle and mechanical tools handles the majority of cases, with chemical options reserved for stubborn carbonate scale.
Gentle, low-risk options:
- Baking soda paste for light organic film and fresh scum.
- Enzyme-based cleaners that break down oils without affecting pH or etching grout.
- Non-abrasive degreasers for sunscreen and lotion residue.
- Soft nylon brushes and sponges for daily or weekly wiping.
Mechanical options, used with care:
- Wet pumice stone for light to moderate carbonate scale on standard ceramic or quartz tile.
- Stiff nylon brush for more stubborn carbonate deposits that resist a sponge.
- Plastic scrapers for isolated hard spots, kept away from grout lines to avoid gouging.
Mechanical tools carry real caveats. Pumice must stay wet throughout use or it will scratch the tile glaze, and it has no place on glass mosaic, polished stone, or vinyl surfaces. A stiff brush is fine on textured ceramic but can dull a glossy finish if used aggressively.
Chemical options for carbonate scale:
- Commercial scale-dissolving gels formulated for pool tile, applied per label instructions.
- Diluted muriatic acid, used only after a positive fizz test confirms calcium carbonate, always added to water rather than water added to acid, and left to dwell only as long as the label specifies.
- A neutralizing rinse, typically a baking soda solution, applied immediately after acid contact to stop the reaction and protect grout.
Pro Tip: Keep a bucket of baking soda solution mixed and within reach before you open any acid container, so neutralizing a drip or an overexposed spot takes seconds instead of a frantic search.
A short list of accessories rounds out the kit: chemical-resistant gloves, splash-proof eye protection, a pump sprayer or dedicated acid brush for controlled application, plastic sheeting or covers for ladder rails and other metal fittings, and a separate bucket for collecting neutralized rinse water before disposal. For calcium-specific products designed to work without a full drain, our guide on effective methods for pool tile calcium removal walks through product-matched techniques in more detail.
Step-by-Step Workflow for Cleaning Waterline Tile Without Draining
This sequence covers prep, diagnosis, treatment, and rinse in an order that keeps the job controlled and limits chemical exposure to the smallest area necessary.
- Patch-test first. Confirm your deposit type and check for etching on a hidden tile section before committing to a method, as covered in the diagnostic steps above.
- Gather PPE and cover metal fittings. Gloves, eye protection, and plastic sheeting over ladder rails, light fixtures, and handrails prevent corrosion from acid splash.
- Lower the water a few inches. A submersible pump or your filter's waste setting can draw the level down just enough to expose the full tile band without the structural risk of a complete drain.
- Turn off circulation. This keeps any residual chemical from cycling through your filter and pump system while you work.
- Work in short sections , roughly 3 to 4 feet at a time, rather than treating the whole waterline at once.
- Apply your chosen cleaner (enzyme solution, scale gel, or diluted acid) and observe the dwell time specified on the product label; longer is not better and can damage grout.
- Scrub with the matched tool , wet pumice for carbonate scale on compatible tile, a nylon brush for organic film, or a soft sponge for routine wiping.
- Rinse thoroughly with clean water before moving to the next section, so no product sits longer than intended.
- Neutralize any acid residue with a baking soda solution immediately after rinsing, then rinse again.
- Inspect the section for remaining residue or any sign of etching before moving on to the next.
- Refill slowly once the full band is treated, and restart filtration to circulate the water.
- Test pH and alkalinity about 24 hours later , then adjust as needed to bring both back into range.
A few operational safety points apply across every step. Never mix cleaning products, especially acid with chlorine-based cleaners, since the combination can produce dangerous fumes. Keep children and pets away from the work area until surfaces are rinsed and dry. Where possible, collect or divert rinse water rather than letting it run freely across the pool deck, and keep acid solutions away from nearby plants and lawn areas, since runoff can kill grass and damage garden beds.
Lowering the water a few inches instead of fully draining is the method that avoids a full drain for most waterline treatments, and it meaningfully reduces the structural risk tied to complete drainage. This single adjustment, exposing the band without emptying the pool, is what makes the rest of this workflow possible for most home pools, according to pool tile cleaning guidance.
Work methodically rather than rushing the whole perimeter at once. A section-by-section approach keeps chemical contact time consistent, makes neutralization easier to manage, and gives you a chance to catch a developing problem, like unexpected etching, before it spreads to tile you haven't touched yet. For a broader look at this same sequence applied to everyday cleaning rather than heavy scale removal, see our guide on how to easily clean pool tiles.
Aftercare: Rebalancing Water and Protecting Tile After Cleaning
Cleaning the tile is only half the job. What happens in the 24 hours afterward determines whether the band stays clean or starts rebuilding almost immediately.
- Test pH, alkalinity, and calcium hardness the day after cleaning, since acid use lowers pH and can shift alkalinity even when applied carefully to a small section.
- Adjust pH back into range before it has a chance to drift toward the high end that encourages new calcium deposits.
- Neutralize any residual acid on surrounding surfaces , including deck concrete or stone coping, with a baking soda rinse to prevent etching that shows up days later.
- Check metal fittings you covered during cleaning for any missed splash, and rinse those areas promptly if you find any.
- Confirm calcium hardness is within range , since both low and high extremes contribute to surface problems, scale on the high end and surface etching on the low end.
Rebalancing is not optional cleanup, it is the step that prevents the work you just did from being undone within a month. Acid use in particular affects pH more than most pool owners expect, so a test kit reading immediately after cleaning tends to look different from the baseline reading you started with.
Sealers and grout treatments have a place here too, though timing matters. Apply a sealer only after tile and grout are fully clean and dry, never immediately after an acid treatment while residue might still be present. A properly applied sealer on grout and natural stone reduces how often minerals and oils can bond to the surface in the first place, which means less frequent heavy cleaning down the road. For grout-specific protection, our overview of calcium buildup and safe removal covers how sealing fits into a longer-term maintenance plan.
Routine Maintenance Plan to Prevent Future Waterline Scale
A consistent, low-effort routine does more to prevent scale buildup than any single deep clean. The goal is to interrupt the bond between oils and minerals before it has time to set.
- Weekly : wipe the scum band with a sponge and an enzyme or mild degreaser. A 90-second wipe while the film is still fresh replaces an hour of scrubbing once it has bonded to the tile.
- Monthly : brush the full tile line, run an enzyme treatment through the water, and spot-check pH and alkalinity so neither drifts far enough to trigger new scale.
- Seasonally : inspect grout lines for recession or wear, consider applying or refreshing a sealer, and use a pool cover when practical to slow evaporation, which is one of the main drivers of mineral concentration at the waterline.
Enzyme treatments work best as a preventive habit rather than a rescue tool. Used consistently, they keep oils from binding minerals to the tile in the first place, which is a meaningful part of why routine maintenance reduces the need for aggressive treatments over time. Skipping the weekly wipe is the single most common reason a clean tile line turns into a multi-hour acid job three months later.
Eco-Friendly Product Guidance for a Safer Cleaning Routine
Acid-free and enzyme-based cleaners cover most of what a pool owner needs for day-to-day and weekly maintenance. They handle organic film, light mineral haze, and the routine wipe-downs that keep buildup from setting in, without the handling precautions that diluted acid requires.
Deeper carbonate removal is a different task, and it calls for a product matched to that specific job rather than a general all-purpose cleaner. We carry acid-free calcium removers formulated to dissolve carbonate scale without the corrosion risk or fumes of traditional muriatic acid, which matters most for pool owners cleaning near metal fittings, vinyl liners, or natural stone coping where harsher acids carry more risk.
Our product categories map directly onto the steps in this guide:
- Tile and stone cleaners for the routine wiping and monthly brushing stages.
- Acid-free calcium releasers for carbonate scale that needs more than enzyme treatment but without the handling risk of traditional acid.
- Protectors and sealers applied after a full clean to slow how quickly new buildup forms on grout and natural stone.
Whichever product you choose, patch-test on an inconspicuous section first, read the safety data sheet and label instructions fully before application, and check the product page for compatibility with your specific tile or stone type. Glass mosaic, polished stone, and natural travertine each have different sensitivities, and the right eco-friendly formula still needs to match the surface it's going on. Our breakdown of pool tile acid washing covers when a stronger method is genuinely necessary versus when an acid-free option will do the job.
A Practitioner's Note on Common Mistakes
The most common mistake I see is reaching for acid before confirming it's even the right tool. Carbonate scale fizzes and responds well to acid; silicate scale does not, and dumping more acid on a deposit that isn't reacting just risks grout damage for no payoff. A close second is using pumice dry, which scratches tile in seconds, and the third is forgetting to cover metal ladder rails and fittings before any chemical touches the water.
Working in smaller sections, about 3 to 4 feet at a time, makes the whole job faster and safer, because you can rinse and inspect before chemical residue has a chance to sit too long. Regular enzyme treatments between deep cleans cut down how often you need to do this at all. Keep a small kit, enzyme cleaner, a sponge, gloves, and baking soda, somewhere accessible so a quick wipe doesn't turn into a project. Always patch-test, and treat acid as a last resort rather than a default.
Where to Find Eco-Friendly Cleaners and Sealers
Once you know what kind of deposit you're dealing with, picking the right product is straightforward. We carry formulas built around the acid-free, plant-based approach this guide recommends, so you can treat carbonate scale and protect tile without working with traditional muriatic acid at home.
A few starting points based on where you are in the process:
- Browse pool tile maintenance products for everyday cleaners suited to weekly and monthly upkeep.
- Check stone and grout sealers if your tile or grout needs protection after a deep clean.
- Visit home essential cleaners for general surface care beyond the pool itself.
Patch-test any new product on an inconspicuous section first, and check each product page for compatibility details and safety data specific to your tile or stone type before treating the full waterline.
FAQ
What's the best thing to clean pool tiles with?
For routine film and light buildup, an enzyme cleaner or mild degreaser with a nylon brush or sponge works well. For calcium carbonate scale, a wet pumice stone or an acid-free scale remover is generally the safer starting point before considering diluted muriatic acid.
How do you clean a pool without draining the water?
Lower the water a few inches to expose the tile band, using a submersible pump or your filter's waste setting, rather than emptying the pool completely. This exposes the full waterline for cleaning while avoiding the structural risk that comes with a full drain.
How often should pool tiles be cleaned?
A quick weekly wipe of the scum band, about 90 seconds with a sponge and mild cleaner, prevents the heavier buildup that later requires scrubbing or acid. A monthly brush and chemistry check catches anything the weekly wipe misses.
Can I replace pool tile without draining?
Individual tile repairs can sometimes be done by lowering the water a few inches, similar to a cleaning job, but full tile replacement around the entire waterline typically requires more extensive drainage. Heavy silicate deposits that don't respond to cleaning often signal it's time to consult a pool professional about replacement options.
Sources

