
Stop Shower Leaks: Code Aligned Caulk vs Grout Rules for Homeowners
Grout belongs in flat, same-plane tile joints; flexible caulk or sealant belongs wherever planes change, like inside corners, floor-to-wall seams, and tile-to-fixture edges. This split follows movement-joint standards like TCNA EJ171 and ANSI guidance, plus ASTM C920 for sealant performance. Get it backward and you invite cracked grout, hidden leaks, mold, and repairs that come sooner than they should.
TL;DR:
- Sealant should be used at all joints that change plane to accommodate movement, while grout is suitable for flat, uniform tile surfaces.
- Caulk remains flexible and can stretch with tile shifts, whereas grout is rigid and prone to cracking in movement joints.
- Proper joint diagnosis involves pressing lightly: if the material feels soft, it's caulk; if hard and gritty, it's grout.
- Use 100% silicone or ASTM C920-rated sealant for humid or wet conditions, and choose epoxy or sanded grout for wider or heavily used joints.
- Regular maintenance with low-VOC sealers and non-abrasive cleaners prolongs joint life and prevents leaks or damage.
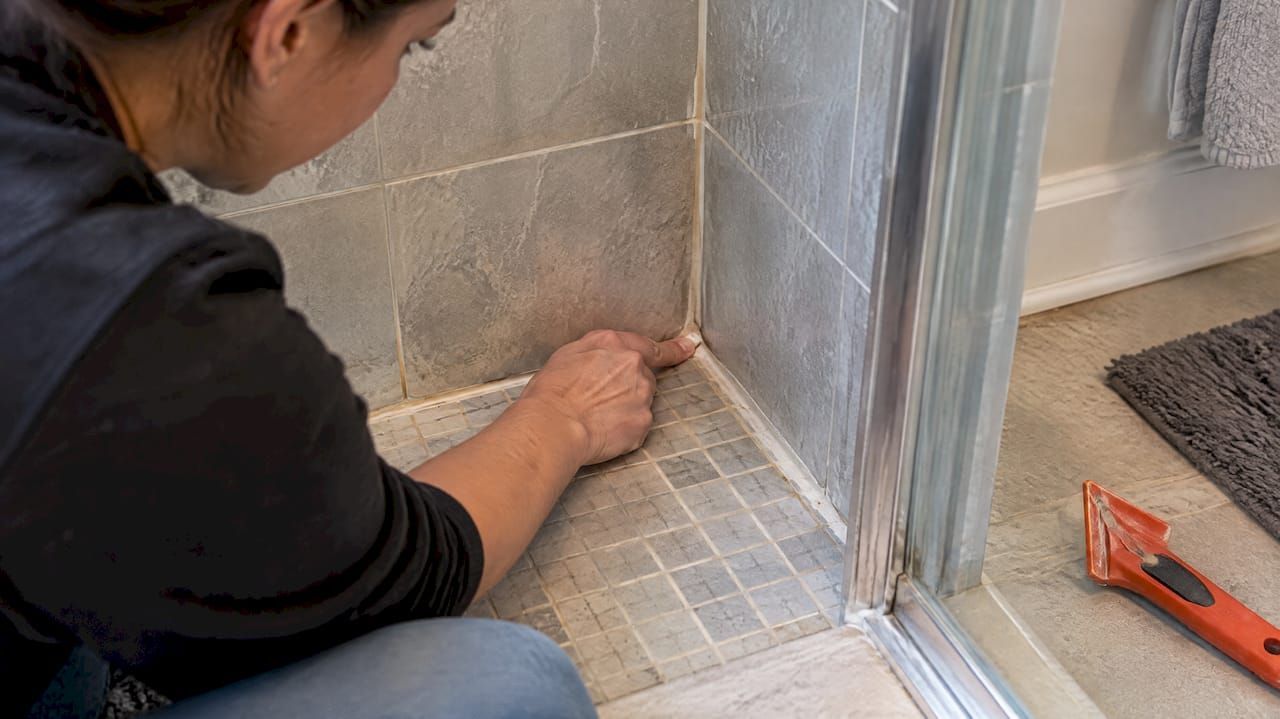
Table of Contents
- Grout and caulk are built from different materials for different jobs
- Where exactly caulk goes versus grout in a shower
- Choosing the right caulk and grout for a wet shower
- How to remove and replace shower caulk
- Keeping caulk and grout in good shape over time
- Common mistakes and when a joint needs a professional
- Our take on what actually protects a shower long term
- Keeping your shower joints in shape after the repair
- FAQ
- Sources
Grout and caulk are built from different materials for different jobs
Grout and caulk look similar once they're in a joint, but they behave nothing alike once water and temperature start moving through a shower.
Grout is a cement-based or epoxy-based filler. Cementitious grout, whether sanded or unsanded, hardens into a rigid, stone-like finish that bonds tightly to tile edges. Epoxy grout cures even harder and resists water and stains better, but it's still rigid once set. Neither type is designed to stretch.
Caulk and sealant are a different category entirely. Common shower-grade options include 100% silicone, siliconized acrylic, polyurethane, and polysulfide formulas. These cure to a flexible, rubbery finish that can compress and expand repeatedly without cracking.
That difference in rigidity versus elasticity matters because tile assemblies move. Heat from showers, humidity swings, and the building settling slightly all cause tiny shifts where one surface meets another.
- Grout is rigid: it bonds tile edges into a fixed, uniform surface with no give.
- Caulk is elastic: it stretches and compresses to absorb motion between two surfaces.
- Mismatching the two means the rigid material cracks first when movement has nowhere else to go.
A flat wall of tile moves as one unit, so rigid grout works fine there. A corner where two walls meet, or where a wall meets the shower floor, moves independently on each side. Grout in that spot has no way to flex, so it eventually fractures.
Where exactly caulk goes versus grout in a shower
Mapping the right material to the right spot comes down to one question: does this joint sit on a flat plane, or does it cross a change of plane?
- Inside corners where two tiled walls meet need flexible sealant, not grout, because each wall panel can shift slightly on its own.
- Floor-to-wall transitions are the joint most prone to movement and the most common place homeowners find cracked grout.
- Tile-to-tub or tile-to-shower-pan seams need caulk since the tub or pan and the tile wall expand and settle differently.
- Tile-to-fixture joints , around faucets, shower arms, and drains, need sealant because fixtures can move slightly with use.
- Perimeter edges , where tile meets a window frame, niche edge, or ceiling line, also count as changes of plane.
- Flat, same-plane tile joints , the regular grid of tile on an open wall or floor, are correctly filled with grout.
This isn't a stylistic preference. TCNA EJ171 and ANSI installation standards call for movement joints at every change of plane, and they recommend movement joints at regular intervals even across large flat fields, often around every 25 feet in interior areas that aren't exposed to direct sun or heavy temperature swings, with closer spacing where exposure is greater. The principle is simple: wherever tile sections can move independently, the joint between them needs a material that can move with them.
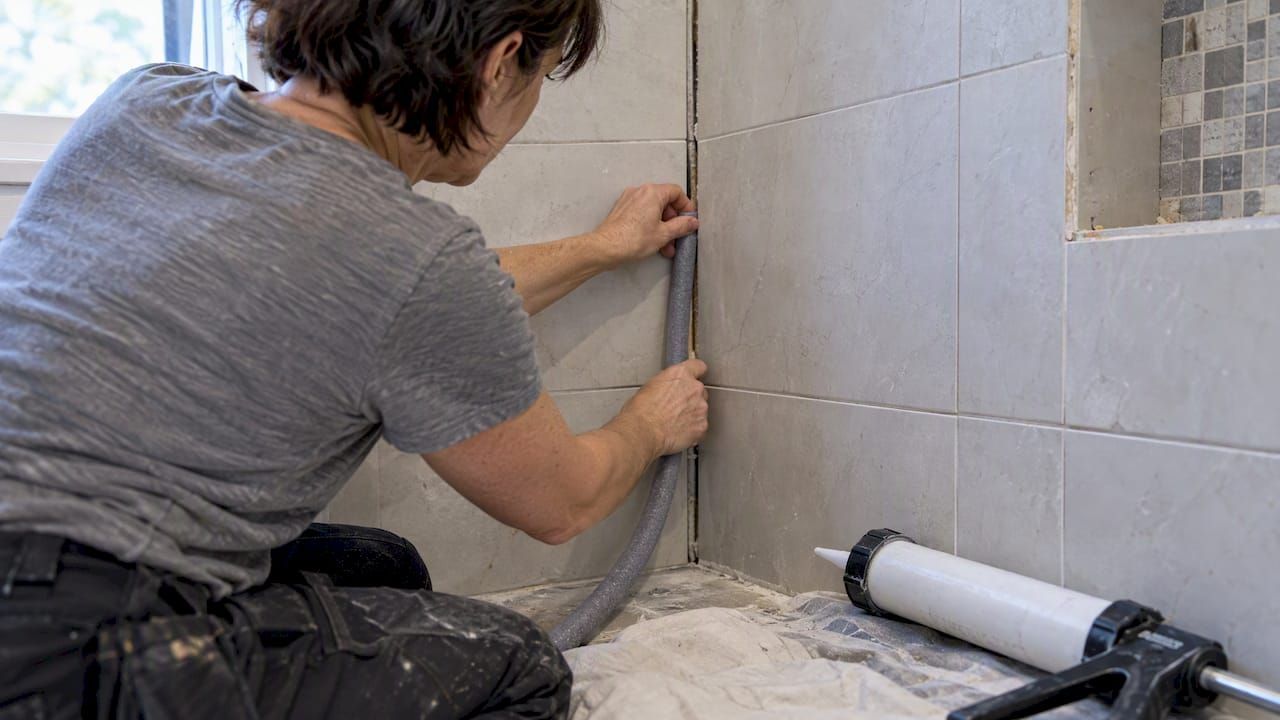
Backer rod plays a quiet but important role here. It's a flexible foam rope pressed into a deep or wide joint before caulking, and it does two things: it controls how deep the sealant sits, and it stops the sealant from bonding to the back of the joint. A sealant bonded on three sides, back included, can't flex properly and tends to tear. For corners and transitions that see constant wear, a prefabricated movement-joint profile can be a better long-term fix than caulk alone, since it's built to accommodate movement without needing periodic resealing.
Pro Tip: Press a fingernail into a suspect joint. If it's hard and brittle, it's grout and shouldn't be there; if it's soft and gives slightly, it's caulk and may just need renewal.
Diagnosing a failing joint isn't complicated once you know what to look for: hairline cracks running along a corner, grout that's pulling away from the tile edge, or dark staining that suggests moisture has been sitting in the gap.
Choosing the right caulk and grout for a wet shower
Material choice inside each category matters almost as much as choosing caulk over grout in the first place.
For any joint that stays wet or sees constant humidity, look for 100% silicone or another sealant explicitly rated to ASTM C920, the industry standard for elastomeric joint sealants. Siliconized acrylic is easier to apply and paintable, but testing consistently shows it loses to pure silicone on long-term water resistance and flexibility, which makes it a weaker pick for a shower corner that never fully dries.
On the grout side, the choice depends on joint width and exposure:
- Unsanded grout suits narrow joints (under 1/8 inch) and delicate stone tile that sanded grout could scratch.
- Sanded grout holds up better in wider joints and resists shrinking as it cures.
- Epoxy grout costs more but resists stains and water penetration better than cement-based options, which makes it a solid choice for shower floors and benches.
Color matching between grout and caulk is a common headache. A few routes around it: buy sealant specifically sold as color-matched to a grout line, recolor aging grout so it matches new caulk, or switch to a prefabricated movement-joint profile that skips the color question entirely. For tile installers wrestling with shade differences, SurfacesGalore's color-matching guidance covers practical techniques worth a look. If an existing grout line has faded or discolored, our guide to recoloring tile grout walks through that process step by step.
When comparing products, check the label for low-VOC or zero-VOC claims and plant-based or biodegradable formulas if indoor air quality and runoff matter to your household, since many conventional sealers and cleaners rely on harsher solvents than the job actually requires.
How to remove and replace shower caulk
Re-caulking a shower corner is a weekend-sized job if you work through it in order.
- Ventilate the bathroom and gather a utility knife, caulk removal tool, rubbing alcohol or a dedicated caulk softener, painter's tape, backer rod, a caulk gun, and your chosen sealant.
- Score the old caulk along both edges with a utility knife, then peel it away in sections using a plastic scraper or dedicated caulk removal tool.
- Apply a caulk softener to any stubborn residue, following its label timing, then scrape again.
- Clean the joint thoroughly with rubbing alcohol to remove soap film and residue, and inspect the exposed substrate for soft spots, discoloration, or mold, which signal a bigger problem behind the tile.
- Let the area dry completely , ideally 24 hours with a fan or dehumidifier running, since sealant applied over damp substrate won't bond properly.
- Set backer rod into any joint wider than about 1/4 inch, pressed to a depth that leaves room for the sealant bead without over-filling the joint.
- Tape both edges of the joint with painter's tape for a clean line, then apply the sealant in one continuous bead at a 45-degree angle.
- Tool the bead with a caulk finishing tool or a wet finger before it skins over, then remove the tape immediately.
- Let it cure fully before running water on it. Most 100% silicone sealants need 24 hours to reach a durable cure, though full cure times vary by product.
One clear sequencing rule matters more than any single step: grout flat joints first, let the grout cure and dry completely, and only caulk the changes of plane once that's done. Caulking first risks getting sealant on surfaces that still need grouting, and grouting after caulking risks packing rigid material into a joint meant to stay flexible.
If you're overhauling a shower's grout at the same time, our grout renewal checklist covers that process in full.
Keeping caulk and grout in good shape over time
Shower joints don't last forever, and knowing roughly when to expect trouble saves you from discovering a leak the hard way.
Pure silicone caulk tends to outlast siliconized acrylic by a wide margin in constantly wet joints, since acrylic-based formulas break down faster under repeated moisture exposure. Either way, inspect shower corners every few months for early cracking, gaps, or discoloration rather than waiting for a visible leak.
- Clean grout and caulk with non-acidic, pH-neutral cleaners and a soft brush, since abrasive scrubbing and acidic cleaners wear down both materials faster than normal use.
- Avoid bleach-heavy sprays on silicone caulk, which can degrade the surface and encourage mildew to return faster.
- Rinse and dry corners after cleaning so moisture doesn't sit in the joint overnight.
Grout benefits from periodic sealing, which is different from re-caulking. Sealer fills the porous surface of cement-based grout so it resists staining and water absorption, and it needs reapplication roughly once a year in a shower depending on use and product. Sealing shower grout is worth doing on a schedule rather than only after grout starts looking dingy. Caulk, by contrast, isn't sealed, it's simply replaced once it starts cracking or pulling away.
Pro Tip: Mark your calendar when you reseal grout or replace caulk so you're working on a schedule instead of reacting to a leak.
Common mistakes and when a joint needs a professional
The most frequent DIY error is grouting a movement joint that should have been caulked, which guarantees a crack within a season or two. A close second is painting over silicone caulk, which won't adhere and peels almost immediately. Skipping backer rod on a deep or wide joint is another common miss that leads to premature sealant failure.
Watch for red flags that point to damage hiding behind the tile: a substrate that feels soft or spongy when pressed, grout that keeps detaching in the same spot no matter how often it's redone, or a leak that persists after resealing. Any of those suggest the waterproofing membrane or backing board has failed. That's a job for a tile professional, since it usually means removing tile to repair what's underneath rather than just refreshing the surface joint.
Our take on what actually protects a shower long term
Correct installation is the foundation no product can replace. Movement joints placed where TCNA and ANSI guidance say they belong, with the right caulk in the right spot, determine whether a shower stays watertight for years or fights you every season.
Once that foundation is right, ongoing care is what keeps it that way. Grout protection through sealing and the right cleaning products slows down the wear that eventually forces a redo.
Keeping your shower joints in shape after the repair
Oceancare Store's Stone & Grout Sealers are built to protect freshly grouted joints from staining and water absorption using plant-based, low-VOC formulas instead of harsh acids. Our Home Essential Cleaners line handles routine grout and caulk cleaning without the abrasive chemicals that shorten a joint's life. Neither product replaces a properly placed movement joint or a professional repair when the substrate underneath has failed, but both reduce how often you'll need either.
| Maintenance need | Oceancare Store category | What it supports |
|---|---|---|
| Protecting grout from stains and water | Stone & Grout Sealers | Extends time between resealing |
| Routine cleaning of grout and caulk lines | Home Essential Cleaners | Removes soap film without abrasive acids |
| Broader hard-surface care | Pool Tile Maintenance Products | Supports tile and stone beyond the shower |
See the full range at Oceancare Store to find the product that fits your shower.
FAQ
Why do some contractors skip caulk and grout corners instead?
Some installers grout corners anyway because matching caulk color to grout is difficult and homeowners often dislike the look or upkeep of a visible caulk line. Industry commentary notes this is a maintenance trade-off, not a code-compliant choice, since standards still call for flexible sealant at changes of plane.
What comes first, grout or caulk, during installation?
Grout goes in first on all the flat, same-plane tile joints, and it needs to fully cure and dry before any caulking begins. Caulk is applied last, at corners and transitions, once the grouted area is completely dry.
How can I tell if a joint has grout or caulk in it?
Press a fingernail gently into the joint: grout feels hard, gritty, and doesn't give, while caulk feels slightly soft and flexes under light pressure. Grout also often shows a slightly porous, matte texture, while caulk has a smoother, rubbery surface.
Is it fine to use caulk instead of grout everywhere in a shower?
No, caulk isn't meant to replace grout across flat tile fields, since it lacks the rigidity needed to support a uniform tiled surface. Caulk belongs specifically at changes of plane, like corners and floor-to-wall seams, while grout remains correct for the flat joints between tiles.
Sources

