
Homeowners: Remove Calcium Buildup on Stone Without Acid or Damage
That white, chalky crust on your shower tile or countertop is calcium buildup, a mineral deposit left behind when hard water evaporates. The safe approach is simple: identify your stone type first, then clean with non-acid, pH-neutral methods, and finish by sealing the surface to stop deposits from coming back. Skip vinegar, especially on marble, travertine or limestone, since even mild acids can etch and permanently dull these stones.
TL;DR:
- Using dry mechanical removal methods such as a plastic scraper or soft brush is recommended before applying any liquid cleaner to avoid damaging the stone surface.
- Efflorescence and calcium scale can feel different; powdery efflorescence brushes away easily and is linked to internal moisture, while calcium deposits are hard and crystalline.
- A pH-neutral cleaner combined with a poultice is the safest and most effective way to remove stubborn calcium deposits from calcareous stones without risking etching.
- Sealing surfaces regularly and practicing simple habits like squeegeeing and wiping reduces water penetration, preventing recurring calcium buildup.
- Professional help is advised for deep etching, persistent efflorescence, or crumbling stone to prevent further damage and restore the surface properly.
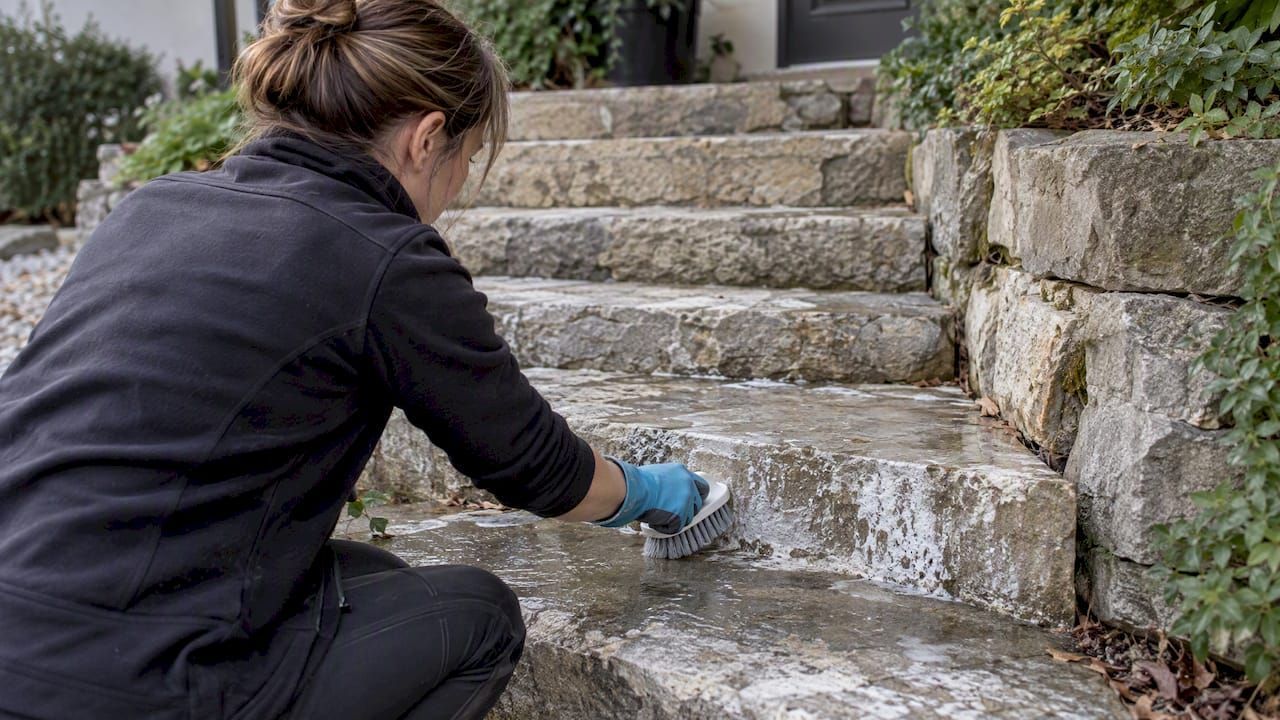
Table of Contents
- Calcium deposits versus efflorescence, soap scum, and etching
- Why hard water and evaporation cause calcium scale
- Step-by-step removal methods by stone type
- Sealing and daily habits that stop buildup from returning
- When a professional should handle it instead
- Acid-free options and a simple test protocol before you treat visible stains
- What homeowners get wrong about calcium removal
- Where to find acid-free cleaners and sealers for your stone
- Where this information comes from
- Sources
- FAQ
Calcium deposits versus efflorescence, soap scum, and etching
Not every white mark on stone is calcium scale, and treating the wrong problem can make things worse. Calcium deposits usually feel hard and slightly crystalline, almost like dried toothpaste, and sit on top of the surface where water last pooled. Efflorescence looks similar but feels powdery and chalky, and it tends to show up on new installations or near grout lines where moisture is migrating through the stone from underneath, as the Natural Stone Institute explains. Soap scum has a greasy, soft film instead of a hard texture, and etching looks like a dull gray patch with no texture change at all, just a loss of shine.
A few quick checks help you sort these out:
- Dry-brush the spot: if it brushes away as powder, suspect efflorescence rather than calcium scale.
- Try a drop of water on the mark: soap scum often smears, while calcium scale stays put.
- Scrape gently with a plastic edge: hard, raised deposits that resist light scraping are usually calcium.
- Check the location: shower walls and faucet bases point to hard water, while fresh grout lines point to moisture migration.
Getting this right changes your entire plan, since efflorescence needs a moisture fix rather than a cleaner, and etching needs repolishing rather than scrubbing.
Why hard water and evaporation cause calcium scale
Calcium buildup forms because water carries dissolved calcium carbonate, and when that water evaporates, the mineral stays behind on the surface. The faster or more frequently water evaporates in one spot, the thicker the deposit becomes over time, which is why shower walls, fountain edges, and pool tile at the waterline are common trouble spots. Stone composition also decides how a surface reacts to both the deposit and to cleaning attempts:
- Calcareous stones such as marble, travertine, and limestone are themselves made of calcium carbonate, so they are chemically similar to the scale sitting on them and react to acids the same way the deposit does.
- Silicate stones such as granite and slate are mineralogically different and generally hold up better against mild acids, though reactive minerals can still appear in some granites.
- Efflorescence, by contrast, comes from moisture inside the material pushing salts to the surface, often tied to installation moisture or a plumbing leak rather than evaporation at the surface.
That distinction between a surface problem and a moisture problem is why the same white residue can call for two completely different fixes.
Step-by-step removal methods by stone type
Start gentle and escalate only if needed, since the goal is removing the deposit without damaging the stone underneath.
- Dry mechanical removal first. Use a plastic scraper held at a low angle, or a soft nylon brush, to lift loose, flaky deposits before introducing any liquid.
- Move to a pH-neutral cleaner. Apply a stone-safe, pH-neutral cleaner with a nylon brush and let it sit for a few minutes before agitating; this handles most light to moderate buildup on both calcareous and silicate stones.
- Rinse and inspect. Rinse thoroughly with clean water and dry with a soft cloth, then check under good light for any dull spots that suggest etching has already started.
- Use a poultice for deep deposits. Mix an absorptive medium like kaolin clay or paper pulp with a non-acidic reagent into a thick paste, spread it over the stain about a quarter-inch thick, cover with plastic, and let it draw the mineral out over 24 to 48 hours. This is a standard approach for stubborn mineral deposits that resist surface cleaning.
- Reserve controlled acid use for acid-resistant stone only. Granite and other acid-resistant surfaces can sometimes tolerate a diluted, mild acid as a last resort, but even then a supplier consultation and spot test are worth the extra ten minutes, since some granites react to acids and sealers in unexpected ways according to sanitation testing.
- Never use these on calcareous stone: vinegar, lemon juice, muriatic acid, abrasive powders, or metal scrapers, all of which can etch or scratch the surface permanently.
- Repeat only after a full dry inspection. If deposits remain, repeat the pH-neutral cleaning step rather than jumping straight to a stronger chemical.
Laboratory testing on calcium carbonate dissolution backs up this cautious approach: common solvents like ethanol and acetone barely touch calcite and aragonite, while reagents such as hydrogen peroxide can be considerably more reactive and alter the mineral surface, according to dissolution kinetics research. That is the core argument for sticking with tested, stone-appropriate products instead of improvising with whatever is in the pantry. For a closer look at acid-free descaling techniques, see this guide to natural stone descaling.
Pro Tip: Always test any cleaner on a hidden corner of the stone and wait a full day before treating the visible area, since some reactions only show up after the surface dries.
Sealing and daily habits that stop buildup from returning
Removing existing calcium is only half the job. A penetrating sealer applied at installation, and reapplied on a regular schedule, reduces how much water soaks into the stone in the first place, which is the single biggest lever against recurring deposits, per Natural Stone Institute care guidance. Pair that with a few daily habits:
- Squeegee shower walls and doors after every use to stop water from sitting long enough to evaporate on the surface.
- Wipe down countertops near sinks with a pH-neutral cleaner instead of letting puddles dry on their own.
- Improve bathroom ventilation to speed up drying and cut down on standing moisture near grout lines.
- Redirect sprinkler splash or roof drainage away from exterior stone and patio surfaces where mineral-laden water collects.
- Consider a whole-home water softener if hard water is a persistent issue across multiple surfaces.
Pro Tip: Reseal showers and countertops roughly once a year, or sooner if water stops beading on the surface, since that is the clearest sign the sealer has worn through.
A quick weekly wipe-down takes less effort than a weekend spent poulticing a stain that hard water built over months.
When a professional should handle it instead
Some situations are worth handing off rather than risking with more scrubbing. Deep or widespread etching, efflorescence that keeps returning after you have dried the area, or stone that feels soft or is visibly crumbling at the edges are all signs the problem has moved past routine cleaning.
- Large or deep etched areas usually need professional repolishing equipment to restore the finish evenly.
- Persistent efflorescence despite surface drying points to a hidden moisture source, which needs a plumber or mason, not another cleaning pass.
- Porous stone that is breaking down at the surface may need structural assessment before any more cleaning is attempted.
When you do call someone, ask whether they test on a hidden area first, whether they guarantee the finish afterward, and whether their descaling method is mechanical or chemical, since that tells you how much risk is involved.
Acid-free options and a simple test protocol before you treat visible stains
Acid-free, plant-based cleaners avoid the etching risk that comes with vinegar or muriatic acid, which matters most on calcareous stone where the deposit and the stone itself share the same chemistry. Before treating any visible stain, run through a short checklist:
- Pick an inconspicuous spot, ideally a corner or underside edge.
- Apply the cleaner exactly as you plan to use it on the visible area.
- Wait 24 hours and inspect under good light for dullness, color change, or texture shift.
- Only proceed on the main surface once the test spot shows no etching or discoloration.
Oceancare Store's resources on calcium buildup basics and acid-free deposit removal walk through these same principles in more depth.
What homeowners get wrong about calcium removal
Most advice on this topic treats calcium buildup as a one-time cleaning job instead of an ongoing water problem. The real fix is less about finding a stronger cleaner and more about controlling how long water sits on the surface in the first place. Vinegar keeps getting recommended in general home-cleaning content because it works well on glass and ceramic, but that advice does not transfer to calcareous stone, where the same acid that cuts through scale also attacks the stone underneath.
The other mistake is skipping sealer because the stone looks fine. By the time deposits are visible, water has already been soaking in for a while, and sealing after the fact only slows the next round rather than preventing it. If you prioritize one thing from everything here, make it sealing and drying habits over chemical firepower. A gentler cleaner used consistently beats a strong one used occasionally, and it is far cheaper than a repolishing bill.
Where to find acid-free cleaners and sealers for your stone
Oceancare Store's Stone & Grout Sealers line is built for exactly this kind of prevention, using plant-based, low-VOC formulas instead of the harsh acids that put calcareous stone at risk. If you are dealing with active buildup, the Home Essential Cleaners category covers pH-neutral options for routine maintenance, and the Pool Tile Maintenance Products line addresses waterline scale on pool surfaces specifically.
Test any product on a hidden area first, then contact product support for help matching a sealer or cleaner to your specific stone type before purchasing.
Where this information comes from
This article draws on stone-care guidance from the Natural Stone Institute, dissolution research from OSTI, and medical context from Harvard Health.
Sources
FAQ
How do you remove calcium buildup from stone?
Start by gently removing loose deposits with a plastic scraper or soft brush. Then use a stone-safe, pH-neutral cleaner and a nylon brush. Always test the product on a small, hidden area first. For stubborn deposits, follow the cleaner manufacturer's directions or consult a stone-care professional.
Can you remove calcium deposits from marble without acid?
Yes. Start with gentle mechanical removal and a stone-safe, pH-neutral cleaner. Avoid vinegar, lemon juice, muriatic acid, and other acidic products because marble can be etched and permanently dulled by acids.
How do you remove hard water stains from natural stone?
Identify the stone type first, then gently remove surface deposits and use a pH-neutral stone cleaner. Drying the surface after cleaning and reducing standing water can also help prevent hard water deposits from returning.
Does vinegar dissolve calcium deposits on stone?
Vinegar can dissolve mineral deposits, but it should not be used on acid-sensitive natural stones such as marble, travertine, and limestone. The acid can also react with the stone itself and cause etching. A stone-safe, acid-free cleaning method is a safer choice.

