
Pool-Side Stone Care Options for Homeowners
TL;DR:
- Daily debris removal, pH-neutral cleaning, and periodic resealing ensure pool-side natural stone remains durable and attractive. Regular inspection, proper stain removal, and choosing low-maintenance stones like granite or quartzite help prevent costly damage and extend the stone's lifespan. Eco-friendly products from Oceancarestore support effective, gentle maintenance suitable for all stone types.
The best approach for pool-side natural stone is daily debris control, monthly pH-neutral cleaning, annual exterior-grade sealing, and prompt spot treatment before stains set. Get these four habits right and your stone will stay safe, beautiful, and structurally sound over the long term.
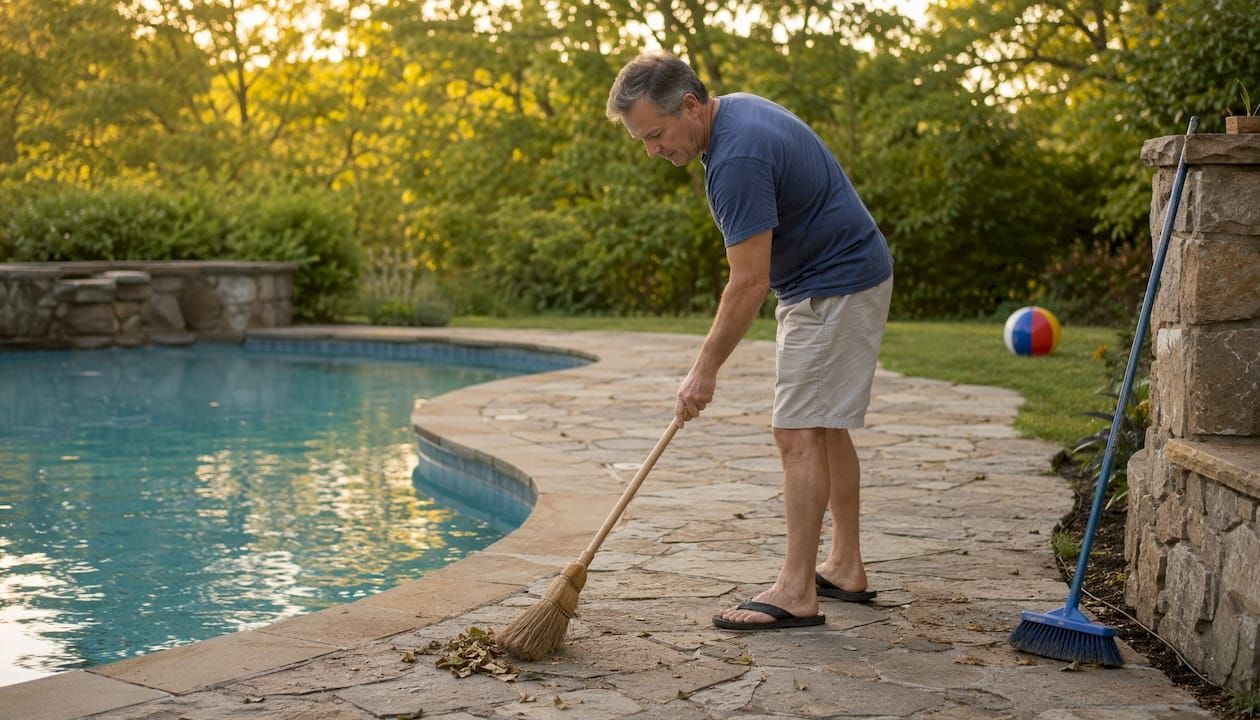
Five immediate steps:
- Sweep the deck every day, or after any heavy use, before debris has a chance to stain
- Rinse with fresh water after each swim session to flush chlorine and mineral residue
- Clean monthly with a pH-neutral stone cleaner — never vinegar, never lemon juice
- Run the water-bead test every few months to check whether your sealer is still working
- Call a professional if you see salt wicking, widespread spalling, or coping that shifts underfoot
Pro Tip: Sweep before you hose down, not after. Wet debris sticks and smears into porous stone. Also keep your pool water level roughly 75–100 mm below the coping line. Water sitting too close pulls dissolved salts directly into the stone.
Table of Contents
- What does a solid pool stone maintenance routine actually look like?
- How do you clean pool stone based on stone type and situation?
- How do you choose and apply the right sealer for pool stone?
- Which natural stones work best around a pool?
- What everyday habits protect pool stone from damage?
- How do you identify and remove common pool stone stains?
- What does pool stone maintenance cost, and when should you do it?
- When should you call a professional instead of doing it yourself?
- Oceancarestore product recommendations for pool stone care
- Key Takeaways
- The trade-off most homeowners underestimate
- Start your pool stone care routine with Oceancarestore
- Useful sources and further reading
What does a solid pool stone maintenance routine actually look like?
Most stone damage around pools is slow and invisible until it is not. A consistent schedule catches problems early, before a $40 cleaning job turns into a $2,000 restoration.
Daily and after-use habits
Sweep loose debris off the deck every day. Leaves, dirt, and organic matter start breaking down within hours in a warm, wet environment, and the tannins and acids they release will stain unprotected stone. After any heavy pool use, rinse the entire surround with a garden hose at mains pressure. This single step, backed by expert guidance on debris management, does more to prevent long-term staining than almost any product.
Remove wet towels, sunscreen bottles, and anything oily from the stone surface as soon as you notice them. Oils penetrate fast, especially in warm weather.
Weekly tasks
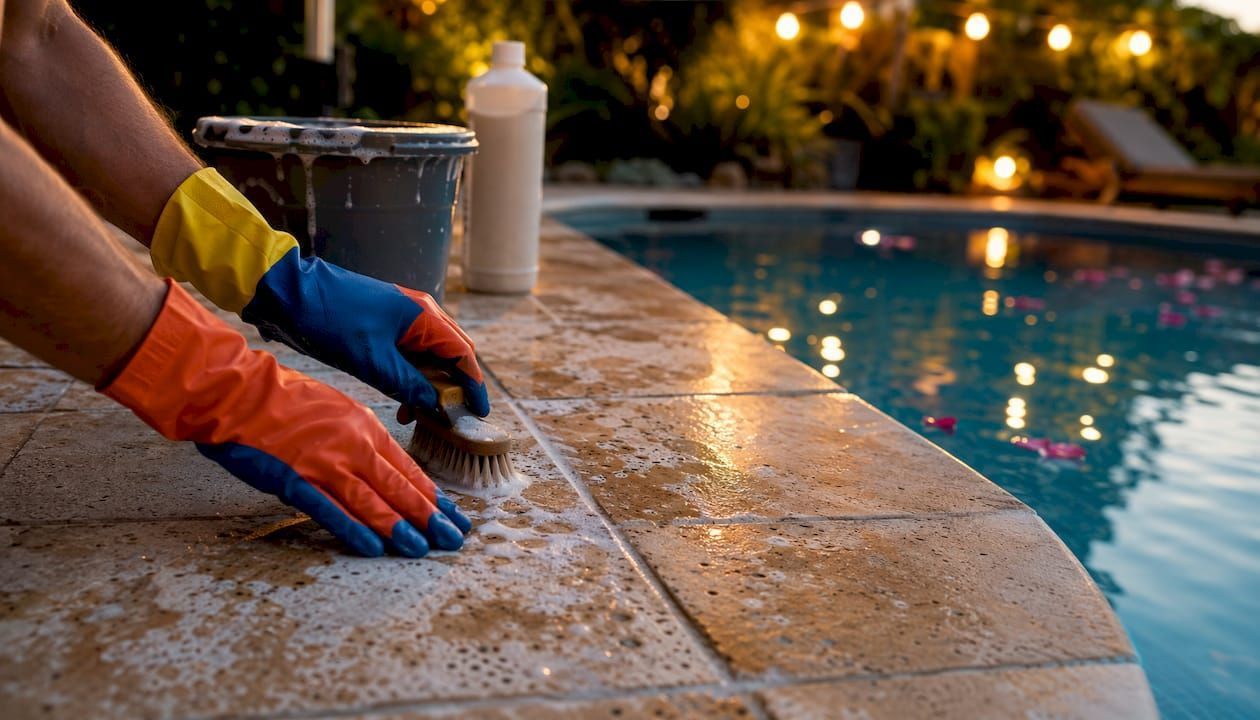
Inspect grout lines for cracks, discoloration, or soft spots. Run a soft-bristle brush along textured or grouted areas to dislodge grit before it grinds into the surface underfoot. If you spot a sunscreen smear or oil drip, treat it now with a pH-neutral cleaner and a soft cloth rather than letting it cure into the stone.
Monthly tasks
Do a full rinse, then clean the entire surface with a pH-neutral stone cleaner concentrate diluted per the manufacturer's instructions. After the surface dries, run the water-bead test: pour a small amount of water on the stone and watch for five minutes. If it beads up, your sealer is holding. If it soaks in and darkens the stone, resealing is due.
Check for efflorescence — that chalky white powder that appears when moisture carries salts up through porous stone. Catching it early means a simple pH-neutral scrub. Left alone, it signals deeper moisture intrusion.
Practical tools you need
- Soft-bristle push broom (natural or nylon — avoid metal)
- Garden hose with an adjustable spray nozzle
- pH-neutral stone cleaner (liquid or concentrate)
- Soft-bristle scrub brush for grout lines
- Clean microfiber cloths for spot treatment
Pro Tip: Monthly cleaning is most effective when the stone surface is cool. Cleaning in direct midday sun causes the cleaner to evaporate before it can work, and it can leave residue streaks on darker stones.
How do you clean pool stone based on stone type and situation?
Not all stone responds the same way to the same cleaner. Getting this wrong — especially with acid-based products on calcite stones — causes permanent etching that no amount of scrubbing will fix.
Calcareous vs. siliceous: why it matters
Calcareous stones (marble, travertine, limestone) contain calcium carbonate. Acids dissolve calcium carbonate. That means vinegar, lemon juice, muriatic acid, and most bathroom tile cleaners will chemically burn the surface. The Natural Stone Institute is explicit: use neutral-pH cleaners around pH 7.0 on all natural stone, and never use acidic household cleaners on calcite-based surfaces.
Siliceous stones (granite, quartzite, bluestone, slate) are more chemically resistant, but they are not immune. They still need pH-neutral cleaners for routine care, and they still need sealing if they are porous.
Stone comparison at a glance
| Stone | Porosity | Chemical sensitivity | Slip safety (wet) | Recommended finish |
|---|---|---|---|---|
| Granite | Very low | Low | Good | Flamed or brushed |
| Quartzite (verified) | Low | Low | Good | Natural cleft or brushed |
| Travertine | High | High (calcite) | Moderate | Tumbled or brushed |
| Limestone | High | High (calcite) | Moderate | Bush-hammered |
| Marble | Medium | High (calcite) | Poor (polished) | Honed or sandblasted |
| Bluestone | Low–medium | Low | Good | Natural cleft |
| Slate | Low | Low | Good | Natural cleft |
Step-by-step cleaning workflows
Everyday grime
- Sweep or blow off loose debris
- Rinse with fresh water
- Apply pH-neutral cleaner diluted per label instructions
- Scrub gently with a soft-bristle brush
- Rinse thoroughly and allow to air dry
Sunscreen and oil spots
- Blot immediately — do not wipe, which spreads the oil
- Apply a pH-neutral degreasing stone cleaner directly to the spot
- Let it dwell for 3–5 minutes
- Scrub with a soft brush and rinse
- If the stain persists after drying, apply a poultice (absorbent powder mixed with a cleaning agent) and cover with plastic wrap for 24 hours
Salt splash or chemical drips
- Rinse the area immediately with fresh water
- Clean with pH-neutral cleaner
- Inspect for whitening or surface dullness — early etching on calcite stones shows as a matte patch
- If etching is visible on calcareous stone, stop DIY treatment and consult a stone restoration professional
Algae and biological growth
For algae around a pool, the Natural Stone Institute recommends flushing with clear water and using a mild bleach solution. On calcareous stones, use a diluted bleach solution carefully and rinse thoroughly — bleach is alkaline, not acidic, so it does not etch calcite, but overuse can dull some finishes. Soft-wash treatments with specialized biological cleaners are the safest option for heavy growth.
Mineral and calcium scale
Calcium scale (the white crusty buildup at the waterline) requires a dedicated calcium removal product formulated for natural stone. Never use muriatic acid on stone tile — it permanently alters color and destroys the surface. Apply the calcium remover per instructions, let it dwell, then scrub and rinse.
Safety callouts:
- Never use polished finishes on pool surrounds — they become dangerously slippery when wet
- Wear gloves and eye protection when using any concentrated cleaner or remover
- Pressure washing above 1,000–1,200 PSI risks pitting and surface damage; use soft-wash or steam cleaning at approximately 225°F instead
How do you choose and apply the right sealer for pool stone?
Sealing pool stone is more demanding than sealing interior stone. The combination of UV exposure, pool chemicals, and moisture cycling breaks down standard interior sealers within months. Exterior-rated fluoropolymer or silicone-resin sealers outperform basic acrylic penetrating sealers in chemical and UV resistance for poolside use.
Penetrating vs. topical sealers
Penetrating (impregnating) sealers soak into the stone and repel water and oil from within. They do not change the surface appearance significantly and allow the stone to breathe. These are the standard recommendation for exterior pool stone.
Topical sealers sit on the surface and create a film. They can make stone slippery when wet and tend to peel in freeze-thaw conditions. Avoid topical sealers for pool surrounds unless a professional specifies otherwise.
For exterior pool applications, look for stone and grout sealers rated for outdoor use with UV stability and chemical resistance. Interior-rated penetrating sealers often fail outdoors in pool environments — verify compatibility with chlorine or salt pool chemistry before applying anything.
The water-bead test
This is the simplest field check for sealer condition, and you can do it in under five minutes.
- Make sure the stone surface is clean and dry
- Pour a small amount of water (about a tablespoon) onto the stone
- Watch for five minutes
- If the water beads up and sits on the surface, the sealer is working
- If the water soaks in and the stone darkens within five minutes, reseal is due
Run this test in a few spots across the deck, not just one. Sealer wears unevenly, especially in high-traffic areas near steps and entry points.
How often should you reseal?
Sealers typically need to be reapplied regularly for exterior pool stone. Most guidance recommends resealing every 1–2 years for poolside stone based on water-bead test results. Annual resealing is advisable in high-sun climates, salt-water pool environments, or areas with heavy foot traffic. Shaded, low-traffic areas with a freshwater pool may require resealing closer to every two years. Environmental factors that shorten the interval include intense UV exposure, hard water with high mineral content, freeze-thaw cycling, and salt-water pool chemistry.
Pro Tip: Seal before the busy summer season, not after. Applying sealer to stone that has already absorbed a season's worth of sunscreen and chlorine is far less effective than starting with a clean, properly prepped surface.
Application checklist
- Clean the surface thoroughly and let it dry completely (48 hours minimum after wet weather)
- Apply sealer in temperatures between 50°F and 90°F, with low humidity
- Apply in thin, even coats — do not flood the surface
- Wipe off any excess within the manufacturer's specified window (usually 5–10 minutes) to prevent hazy residue
- Allow full cure time before returning the area to use (typically 24–72 hours)
- Seal all exposed surfaces, including the underside of coping that overhangs the pool edge
For guidance on common sealer problems like hazing, uneven absorption, or peeling, Oceancarestore's product support pages cover troubleshooting by stone type.
Which natural stones work best around a pool?
Stone selection is one of the few decisions you make once and live with for the life of the pool. Choose wrong and you are fighting the material every season.
Short selection rules:
- Prefer low-absorption siliceous stones (granite, quartzite, bluestone) for pools with aggressive chemistry, salt-water systems, or freeze-thaw climates
- Light-colored stones stay cooler underfoot in direct sun — a real comfort factor on hot summer days
- Always choose a non-polished finish for slip safety: flamed, brushed, natural cleft, sandblasted, or tumbled surfaces all provide grip when wet
- Verify "quartzite" is true quartzite before purchasing — much of what is sold as quartzite is actually a soft marble-like stone that behaves like limestone
Stone-by-stone breakdown
| Stone | Durability | Porosity | Chemical resistance | UV stability | Maintenance level |
|---|---|---|---|---|---|
| Granite | Excellent | Very low | Excellent | Excellent | Low |
| Quartzite (verified) | Excellent | Low | Good | Good | Low–medium |
| Travertine | Good | High | Poor (calcite) | Good | High |
| Limestone | Moderate | High | Poor (calcite) | Moderate | High |
| Bluestone | Very good | Low–medium | Good | Good | Low–medium |
| Slate | Good | Low | Good | Moderate | Low–medium |
| Marble | Moderate | Medium | Poor (calcite) | Moderate | High |
Granite often has water absorption under 0.2%, making it the most resistant choice for freeze-thaw climates, salt-water pools, and high-chemical environments. Verified quartzite is close behind.
Travertine is popular in warm climates because it stays cool underfoot and its natural texture provides grip, but its high porosity and calcite composition mean it needs aggressive sealing and is a poor choice for freeze-thaw regions unless specially treated.
On finishes: polished stone around a pool is a liability. A wet polished marble or granite surface is as slippery as ice. Flamed finishes (created by rapid heating) open the surface texture and provide excellent grip. Brushed and natural cleft finishes do the same. Sandblasted finishes work well on softer stones. For hardscape integration around pool areas, non-polished finishes also hold up better under furniture and foot traffic over time.
Practical notes:
- Slate can delaminate in freeze-thaw conditions — check with your supplier for frost-rated grades
- Limestone in a salt-water pool environment needs the most aggressive sealing program of any stone on this list
- Light travertine and limestone show efflorescence more visibly than darker stones, which can look alarming but is manageable with the right cleaning routine
What everyday habits protect pool stone from damage?
Prevention is the cheapest form of stone care. The most common causes of damage around pools — sunscreen, pool chemicals, high water levels, and furniture scuffs — are all avoidable with simple habits.
Do/don't checklist:
- Do rinse the deck with fresh water after every pool session to flush chlorine and mineral residue
- Do use rubber or felt pads under all pool furniture legs — metal feet on stone cause rust stains and surface scratches
- Do keep pool water at least 75–100 mm below the coping line to prevent salt wicking into porous stone
- Do blot oil and sunscreen spills immediately rather than wiping them across the surface
- Don't use acid-based cleaners, including vinegar, lemon juice, or muriatic acid, on any natural stone
- Don't drag furniture across the stone surface
- Don't leave wet towels, rubber mats with non-breathable backs, or potted plants sitting directly on the stone for extended periods
Understanding salt wicking
Salt wicking happens when pool water sits too close to the coping. The water carries dissolved salts into the porous stone through capillary action. Over time, those salts crystallize inside the stone, expanding and cracking it from within. Early signs include coping that looks persistently damp even when the surrounding deck is dry, and white powdery deposits appearing on the underside or face of the coping. If you see either, lower the water level immediately.
Simple habit schedule
- After every pool use: rinse deck, remove towels and oils, check water level
- Weekly yard cleanup: sweep, inspect grout, spot-clean any stains
- After a pool party: full rinse, check for sunscreen smears, wipe down furniture contact points
- Seasonal prep (spring/fall): full pH-neutral clean, water-bead test, inspect coping for movement or cracking
Pro Tip: If you have outdoor lighting near the pool surround, check that fixture bases and conduit are not trapping moisture against the stone. Pooled water under a fixture is a direct path to efflorescence and salt damage. For guidance on integrating hardscape lighting safely, consider how fixture placement affects drainage across the deck.
How do you identify and remove common pool stone stains?
The fastest way to ruin a stone surface is to treat the wrong stain with the wrong product. A quick diagnosis before you reach for anything saves the stone and your time.
Quick stain diagnostic
- Brown or tan stain, near organic matter (leaves, algae): organic stain
- Orange, red, or brown stain, often near metal fixtures or furniture: rust or metal stain
- White crusty buildup at the waterline or on grout: calcium or mineral scale
- Green, black, or gray slippery film: biological growth (algae, mold, mildew)
- Dark greasy spot that does not rinse off: oil or sunscreen
Step-by-step removal by stain type
Organic stains (leaves, algae residue, tannins)
- Rinse the area with fresh water
- Apply a pH-neutral cleaner and scrub with a soft brush
- For stubborn staining, apply a poultice made with hydrogen peroxide and an absorbent powder (diatomaceous earth or kaolin clay)
- Cover with plastic wrap and tape the edges; leave for 24 hours
- Remove, rinse thoroughly, and allow to dry before evaluating
Oil and sunscreen stains
- Blot excess oil immediately with a clean cloth
- Apply a pH-neutral degreasing stone cleaner and let it dwell for 5 minutes
- Scrub gently and rinse
- If the stain remains, use a poultice with a solvent-based drawing agent (acetone or mineral spirits) on siliceous stones only — not on calcareous stones
- Rinse completely and reseal the spot once dry
Rust and metal stains
- Do not use acid-based rust removers on calcareous stone — they will etch the surface
- Apply a stone-safe rust remover or iron-out poultice specifically formulated for natural stone
- Let it dwell per product instructions, then rinse
- Repeat if necessary; deep rust stains may require professional treatment
Calcium and mineral scale
- Do not chip or scrape — this scratches the stone
- Apply a dedicated calcium removal formula designed for natural stone tile
- Let it dwell and work on the deposit
- Scrub with a soft brush and rinse thoroughly
- For heavy buildup at the waterline, a second application is often needed
Biological growth (algae, mold, mildew)
- Rinse the area with fresh water
- Apply a diluted bleach solution or a specialized soft-wash biological cleaner
- Let it dwell for 5–10 minutes
- Scrub with a soft brush and rinse thoroughly
- For persistent growth, staged escalation from pH-neutral cleaners to targeted treatments is the professional recommendation — brute-force methods cause more damage than the growth itself
Critical warnings:
- Never use acids on marble, travertine, or limestone — the damage is permanent
- Never exceed 1,000–1,200 PSI with a pressure washer on natural stone
- Never mix bleach with ammonia or other household cleaners
- Oxidizing agents (hydrogen peroxide, bleach) can lighten some darker stones — test in an inconspicuous area first
When to stop and call a pro: if a stain does not respond after two treatment cycles, or if the stone surface shows etching, pitting, or color change after treatment, stop. Further DIY attempts risk making restoration more expensive. The same applies to any stain that has been sitting for more than a few weeks — deep-set stains often need professional poulticing equipment or honing.
What does pool stone maintenance cost, and when should you do it?
Knowing what to expect in terms of time and money helps you plan rather than react. The costs below are ballpark ranges for the US market; actual pricing varies by region, stone type, and surface area.
Annual maintenance timeline includes tasks like sweeping and rinsing regularly, spot cleaning as needed, monthly pH-neutral cleaning, periodic water-bead sealer tests, professional soft-wash treatments occasionally, sealer reapplication depending on stone and usage, grout repair when necessary, stain poultice or restoration treatment as needed, and rare full coping replacement if neglected.
Budgeting perspective:
- A consistent DIY routine (sweeping, rinsing, monthly cleaning) costs under $200 per year in supplies for most residential pools
- Professional resealing every 1–2 years on a typical pool surround (200–400 sq ft) runs $300–$1,600 depending on the contractor and stone type
- Preventive sealing is the single best investment: spending a few hundred dollars every 1–2 years is far cheaper than coping replacement or full-surface restoration
Pro budgeting tip: buy a concentrate cleaner rather than a ready-to-use formula. A quality pH-neutral concentrate covers significantly more surface area per dollar and reduces plastic waste — a practical win for both your budget and the environment.
When should you call a professional instead of doing it yourself?
Some problems look like cleaning issues but are actually structural or chemical failures. Treating them with a mop and a bottle of cleaner wastes time and can accelerate the damage.
Red flags that require a professional:
- Widespread spalling (stone surface flaking or chipping off in layers)
- Hairline cracks running through multiple coping pieces or pavers
- Coping pieces that shift, rock, or feel loose underfoot
- Persistent efflorescence that returns within days of cleaning — this signals active moisture intrusion, not just surface salt
- Salt wicking visible on the underside of coping or on the pool-facing edge
- Adhesive failure: gaps opening between coping and the pool shell
- Any stain that has not responded to two rounds of appropriate treatment
For surface restoration scenarios that go beyond routine cleaning, a qualified stone restoration contractor is the right call.
Questions to ask a stone restoration professional:
- Have you worked specifically on pool surrounds and coping, not just interior stone?
- What sealer products do you use, and are they exterior-rated with UV and chemical resistance?
- Do you provide a warranty on the completed work, and what does it cover?
- Can you provide Safety Data Sheets (SDS) for any products you plan to apply?
- How do you handle calcareous stones differently from siliceous stones?
What to expect before a service visit:
- Clear the pool deck of furniture, plants, and equipment
- Ensure the contractor has access to a water source and drainage
- Ask for a written scope of work before any product is applied
- Expect the area to be off-limits for 24–72 hours after sealing or restoration treatment
Oceancarestore product recommendations for pool stone care
Oceancarestore's product line is built around the principle that effective stone care does not require harsh chemistry. Every product in the pool tile and stone range is formulated to be eco-friendly, low-VOC, and safe for the surfaces and the people around them.
Recommended products and uses
| Product | Intended use | Key compatibility notes |
|---|---|---|
| Pool Tile Maintenance | Routine cleaning, monthly maintenance, removing light scale and grime | Safe for all stone types including calcareous; pH-neutral formula |
| Pool Tile Restorer | Revitalizing dull or stained tile surfaces, removing haze and calcium deposits | Check product page for calcareous stone compatibility; follow dilution instructions |
| Stone & Grout Sealers | Exterior sealing of pool surrounds, coping, and grout lines | Exterior-rated; verify UV and chemical resistance specs on product page |
| Calcium Removal | Targeted removal of calcium scale and mineral deposits at the waterline | Stone-safe formula; follow dwell time and rinse instructions carefully |
Safe usage checklist
- Dilution: always follow the label ratio — more concentrated is not more effective and can leave residue
- Rinse: rinse thoroughly after every cleaning application; residue attracts dirt and can dull sealers
- PPE: wear gloves for concentrated products; eye protection when working with calcium removers or restorers
- Calcareous stone compatibility: confirm any restorer or calcium remover is safe for marble, travertine, or limestone before applying — check the product page or SDS
- Siliceous stone: granite, quartzite, and bluestone are more tolerant, but still require pH-neutral cleaners for routine care
- Environmental precautions: Oceancarestore's plant-based, biodegradable formulas are designed to minimize runoff impact, but avoid applying near pool water or storm drains during treatment
- SDS and technical datasheets: available on each product page at oceancarestore.com — review before first use, especially for commercial or high-volume applications
For a broader look at eco-friendly pool tile and stone care, Oceancarestore's blog covers green cleaning protocols and low-VOC sealing options in detail.
Key Takeaways
Consistent debris control, pH-neutral monthly cleaning, and exterior-grade resealing every 1–2 years are the three habits that determine whether pool-side stone lasts a decade or a lifetime.
| Point | Details |
|---|---|
| Daily sweep and rinse | Remove debris before it stains and rinse with fresh water after every pool session. |
| pH-neutral cleaners only | Use cleaners at pH 7.0; acids permanently etch calcareous stones like marble, travertine, and limestone. |
| Water-bead test for sealer | If water soaks in and darkens the stone within five minutes, reseal is due. |
| Reseal every 1–2 years | Exterior pool stone typically needs resealing every 1–2 years based on water-bead test results; annual resealing is recommended for high-sun, salt-water, or freeze-thaw environments. Use exterior-rated sealers only. |
| Oceancarestore for eco-safe care | Oceancarestore's pH-neutral cleaners, calcium removers, and exterior stone sealers cover the full routine without harsh chemistry. |
The trade-off most homeowners underestimate
Here is the honest truth about pool-side stone: the most beautiful options are often the highest-maintenance ones. Polished marble looks stunning in a showroom and becomes a liability the moment it gets wet. Travertine has a warmth and texture that photographs beautifully, but in a salt-water pool environment without aggressive sealing, it starts deteriorating within a few seasons.
The homeowners who get the most out of their stone are the ones who made a deliberate choice at the selection stage — they picked a stone that matched their actual maintenance commitment, not just their aesthetic preference. Granite and verified quartzite are genuinely low-maintenance. They do not demand quarterly sealing or specialized restoration every few years. Travertine and limestone are not bad choices, but they require a real maintenance program, not just occasional hosing down.
The other thing worth saying plainly: non-polished finishes are not a compromise. Flamed, brushed, and natural cleft surfaces look better over time than polished ones around a pool, because they age gracefully instead of showing every scratch and etch mark. They are also safer. Choosing a textured finish is not settling — it is the smarter call.
For eco-conscious caretakers, Oceancarestore's plant-based, low-VOC approach aligns well with this philosophy: do less harm to the stone, do less harm to the environment, and get better long-term results than you would with aggressive chemistry.
Start your pool stone care routine with Oceancarestore
Stone that looks good for years does not happen by accident. It starts with the right products used in the right order.
Oceancarestore's pool stone care line gives you everything you need to clean, treat, and protect natural stone without reaching for anything harsh or harmful. The starter sequence is straightforward: clean first with the Pool Tile Maintenance formula to remove grime and light scale, treat any calcium deposits with the dedicated calcium removal product, then lock in protection with an exterior-rated stone and grout sealer. All three products are plant-based, low-VOC, and formulated to be safe for calcareous and siliceous stones alike.
Starter kit sequence:
- Clean: Pool Tile Maintenance cleaner — monthly routine and pre-seal prep
- Treat: Calcium Removal product — waterline scale and mineral deposits
- Seal: Stone & Grout Sealer — exterior-rated protection for coping and surrounds
Safety Data Sheets and full technical specs for every product are available on the product pages at oceancarestore.com. Browse the full range, check compatibility for your stone type, and order what you need to get started this season.
Useful sources and further reading
The following references informed the guidance in this article. Consult them for installation standards, product specifications, and restoration protocols.
- Natural Stone Institute — Care and Cleaning Guidance: The primary industry authority on natural stone care. Use for cleaning product selection, pH guidelines, and sealer recommendations. The NSI also publishes guidance on poultice use for stain removal.
- Natural Stone Institute — Poultice Use for Stain Removal: Detailed guidance on poultice preparation and application for organic, oil, and metal stains on natural stone.
- Dynamic Stone Tools — Stone Pool Coping and Surrounds Guide: Practical guidance on stone selection, sealer types, and finish recommendations for pool coping and surrounds.
- The Pool Tile Company — Stone Tile Care and Maintenance: Operational guidance on water level management, salt wicking prevention, and sealing schedules for pool stone.
- Clean Surface Pressure Washing — Cleaning Travertine Pool Decks: Professional perspective on safe cleaning methods, PSI thresholds, and staged treatment escalation for pool stone.
- The Pool and Deck — Natural Stone Maintenance: Practical homeowner-focused schedule for rinsing, cleaning, and annual sealer checks.
- Oceancarestore — Product Pages and SDS: Technical datasheets, Safety Data Sheets, and application instructions for all Oceancarestore pool tile and stone care products. Start here for product-specific compatibility and dilution guidance.

