
Seal Grout, Not Glass Tile: Eco Friendly Low VOC Protectants
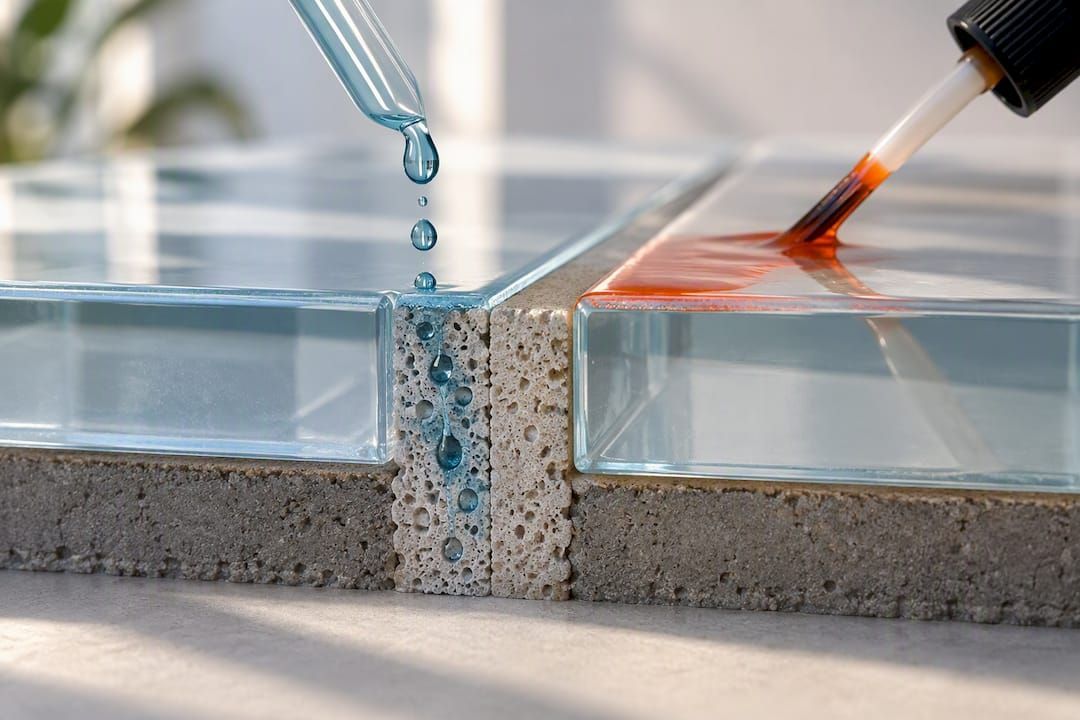
Glass tile itself almost never needs sealing. It's non-porous by nature, so water and grime sit on the surface instead of soaking in. Your grout is a different story: it's porous and should get a penetrating grout sealer once it cures. For showers, pool waterlines, and other soap-heavy spots, an eco-friendly topical glass protectant is worth adding, but it's optional, not mandatory.
TL;DR:
- Glass tile typically does not need sealing because it is non-porous and resists stains on its own.
- Sealing efforts should focus on porous grout joints and porous trim, which require penetrating sealers for water and stain protection.
- Applying a topical glass protectant is optional but beneficial in high-moisture or soap-heavy areas, and it must be tested before full application.
- Timing is crucial for sealers; wait until grout is fully cured, usually 7 to 72 hours, before sealing to avoid trapping moisture.
- Using sealers from different brands together can cause haze or ineffective coverage; stick to one system and follow manufacturer instructions.
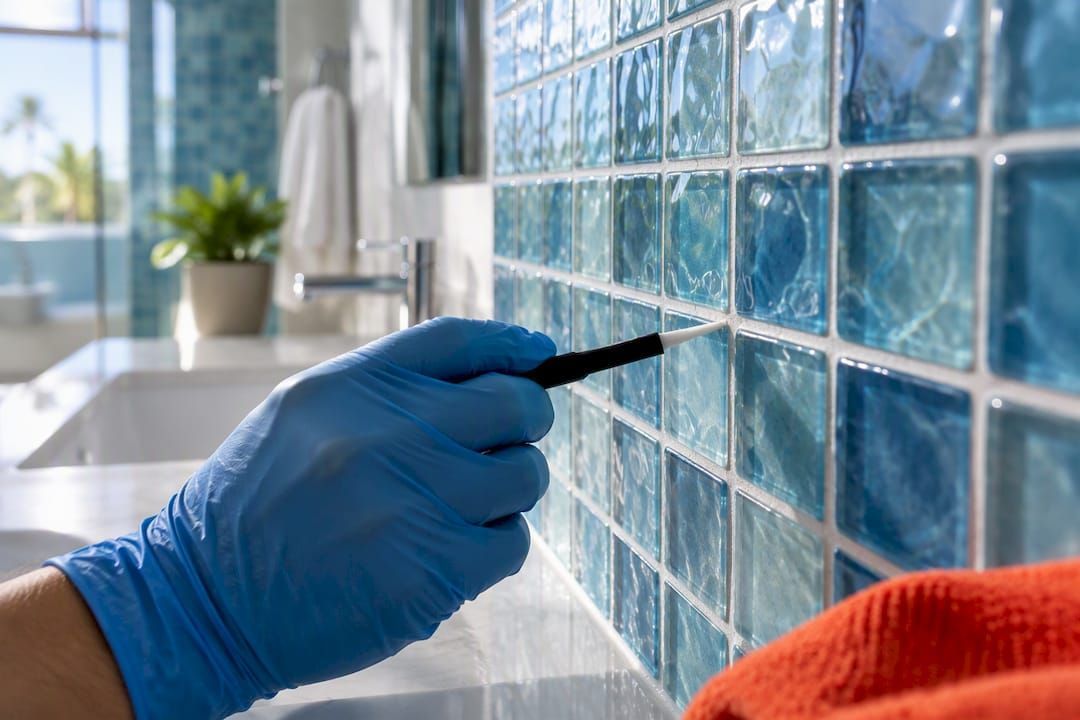
Table of Contents
- Do You Need to Seal Glass Tile?
- What Actually Needs Sealing: Grout, Edges, and Porous Trim
- Penetrating Sealers vs. Topical Protectants: Which One Do You Need?
- How to Prepare and Apply Grout Sealer (Plus an Optional Glass Protectant)
- Compatibility, Safety, and the Mistakes That Ruin a Sealing Job
- Maintenance: Cleaning Routine and When to Re-Seal
- Why Oceancarestore Leans Eco-First on Glass Tile Sealing
- Get an Eco-Friendly Seal on Glass, Grout, and Pool Tile
- Where to Check Manufacturer-Specific Guidance
- Sources
- FAQ
Do You Need to Seal Glass Tile?
Manufacturers are consistent on this point: glass tile is non-porous and typically doesn't need a penetrating sealer the way natural stone does. There's no network of tiny pores for a sealer to fill, so applying one usually adds nothing but cost and a wasted afternoon.
That said, "doesn't need it" isn't the same as "would never benefit from it." A few situations make a topical protectant worth the effort:
- Shower walls and pool waterlines, where soap scum and mineral deposits build up fast
- Kitchen backsplashes behind sinks, where hard water spots accumulate weekly
- Any glass tile surface where you're tired of scrubbing the same haze off every few days
A topical protectant works differently than a penetrating sealer. It sits on top of the glass and creates a hydrophobic layer, so water beads up and rinses away instead of drying into spots. It doesn't soak in, and it doesn't change how the glass looks when applied correctly.
Before you use any product on glass tile, test it on a small, inconspicuous section first. Manufacturer guidance is unanimous on this: chemistry that works beautifully on one glass formulation can haze or streak another.
What Actually Needs Sealing: Grout, Edges, and Porous Trim
Grout is where sealing effort belongs. Standard cementitious grout is full of microscopic pores that soak up water, oil, and dirt, which is exactly why it stains and discolors faster than the tile around it. A penetrating sealer fills those pores without changing the grout's color or texture, so stains and moisture can't get a foothold.
Here's what typically needs attention beyond the glass field itself:
- Cementitious grout joints — the primary candidate for a penetrating, impregnating sealer
- Unglazed trim, bullnose, or porous accent pieces mixed into a glass tile layout
- Cut or exposed substrate edges where tile was trimmed during installation
- Epoxy grout — usually skip this one; epoxy is largely non-porous and doesn't need sealing
Timing matters more than most people expect. Sealing too early traps moisture that hasn't finished curing out of the grout, which can cause discoloration or a hazy film later. Installer guidance recommends waiting until grout has fully cured, a window that varies by product, before applying any sealer.
Penetrating Sealers vs. Topical Protectants: Which One Do You Need?
These two product categories solve different problems, and understanding the split saves you from buying the wrong thing.
Penetrating (impregnating) sealers soak into porous grout and react below the surface, blocking water and stains from getting in. They don't create a film, so they don't alter the look or feel of the grout, and a quality plant-based formula can last one to three years depending on foot traffic, sun exposure, and how often the area gets wet.
Topical hydrophobic protectants work on the surface instead. Applied to glass tile, they create a water-beading layer that cuts down on soap scum and mineral spotting. The trade-off: because they sit on top rather than bonding into the material, they wear off faster in high-friction areas like a shower floor and need more frequent touch-ups than a grout sealer.
- Penetrating sealer → grout, unglazed trim, porous substrate
- Topical protectant → glass tile field in showers, pool waterlines, backsplashes
- Epoxy grout → generally neither, since it's non-porous already
One compatibility rule matters more than any product feature: don't mix sealer chemistries from different manufacturers. Installer documentation specifically warns that cross-brand products can reduce effectiveness or leave a haze that's hard to remove. Stick with one system, and read the technical data sheet before you buy.
Pro Tip: Keep the same brand for cleaner and sealer on a given surface. A neutral cleaner from one line and a sealer from another sounds harmless, but leftover residue from the cleaner can interfere with how the sealer bonds.
How to Prepare and Apply Grout Sealer (Plus an Optional Glass Protectant)
Getting this right is mostly about patience, not skill. Rush the cure time and you'll be redoing the job in six months.
- Confirm grout cure time. Check the grout manufacturer's data sheet. Cure windows commonly run 7 to 72 hours depending on the product, humidity, and room temperature.
- Remove grout haze first. Complete haze removal with a soft brush, a neutral-pH cleaner, and warm water is critical. Sealer applied over leftover haze won't penetrate evenly and can lock the residue in permanently.
- Let the surface dry fully. Any trapped moisture blocks proper sealer penetration.
- Run a test patch. Apply the sealer to a small, hidden section. Note the product name and batch number, then wait 24 to 48 hours to check for discoloration or haze before treating the whole floor or wall.
- Apply the penetrating sealer with an applicator brush or roller, following the dwell time on the label. Wipe away excess before it dries on the surface.
- Apply a topical glass protectant, if using one, with a spray or buffing method in a ventilated space, then buff to clarity with a clean microfiber cloth.
- Clean your tools immediately and let everything cure for the full time listed on the data sheet before the area gets wet again.
If haze shows up after the sealer dries, don't panic and don't reach for an abrasive pad. A manufacturer-approved sealer remover, applied to a small test area first, will usually lift it without damaging the grout underneath.
Compatibility, Safety, and the Mistakes That Ruin a Sealing Job
Most sealing failures aren't about the product. They're about what someone used on the tile before or after applying it.
- Never use scouring pads, steel wool, or abrasive tools on glass tile; they scratch and permanently dull the surface.
- Skip acid-based cleaners entirely. They can etch glass and strip a penetrating sealer out of grout in one pass.
- Don't combine sealers or cleaners from different manufacturers on the same surface. Cross-brand chemistry is a common cause of the cloudy film homeowners can't figure out how to remove.
- If you need to strip an old or failed sealer, use a dedicated sealer remover on a small test spot before treating the whole surface.
Pro Tip: Save the technical data sheet and batch number for every product you use. If a sealer fails or a warranty claim comes up, that information is what the manufacturer needs, and you won't remember it a year from now.
Maintenance: Cleaning Routine and When to Re-Seal
Day-to-day upkeep is simple: neutral-pH cleaner, a microfiber cloth, and nothing abrasive. That routine alone prevents most of the staining problems people blame on "bad sealer."
To check whether your grout sealer is still doing its job, drip a small amount of water onto the grout line. If it beads up, the seal is holding. If it soaks in within a few seconds, it's time to reapply.
- Clean weekly with a neutral, non-abrasive product
- Run the water-bead test every few months in high-exposure areas
- Plan to re-seal grout periodically, depending on traffic and moisture exposure, as grout sealers wear down over time.
- Call a professional if you see persistent staining, crumbling grout, or a sealer that keeps failing within months of application
Why Oceancarestore Leans Eco-First on Glass Tile Sealing
Harsh, solvent-heavy sealers can outlast plant-based ones by a narrow margin in lab conditions, but that edge rarely matters in a bathroom or around a pool where ventilation is limited and skin contact is constant. A low-VOC, plant-based sealer trades a little maximum service life for a formula that's safer to apply indoors and around water features. For most homeowners, that trade is an easy one to make. Always confirm real-world performance against the product's own technical data sheet.
Get an Eco-Friendly Seal on Glass, Grout, and Pool Tile
Oceancarestore built Glass & Tile Shield around the exact gap this guide just walked through: a low-VOC, plant-based topical protectant for glass tile, pool waterlines, and other high-exposure spots where soap scum and hard water are a constant fight.
This type of product is formulated to be safe around sensitive surfaces and pool environments, which matters if you're treating an indoor shower or a space with limited airflow. If your grout still needs a penetrating sealer instead, Oceancarestore's Stone & Grout Sealers category covers that job without introducing a second manufacturer's chemistry into the mix, and its Home Essential Cleaners line keeps routine cleaning neutral pH so you don't undo the sealer's work. Before treating a full wall or floor, run a test patch exactly as outlined above, check the product's technical data sheet, and confirm it's compatible with your specific glass tile finish.
Where to Check Manufacturer-Specific Guidance
Cure times, cleaning recommendations, and sealer compatibility vary by tile line, so check the manufacturer's own documentation before you buy anything. Daltile's care guide and Crossville's maintenance PDF are solid starting points, and the Old Port Specialty Tile installer guide covers cure timing and cross-brand compatibility in more detail than most retail product pages.
Sources
FAQ
Should You Seal Glass Tile?
No, not usually. Glass tile is non-porous and resists staining on its own, so a penetrating sealer isn't necessary. Sealing effort belongs on the grout joints between the tiles, with an optional topical protectant on the glass in high-soap or high-moisture areas.
What Is the Best Waterproof Sealant for Glass Tile?
Glass tile doesn't need a waterproofing sealant in the traditional sense, since water can't penetrate it anyway. For water beading and reduced soap scum on glass surfaces like shower walls, a low-VOC hydrophobic protectant such as Glass & Tile Shield handles that job.
What Do You Seal Mosaic Tiles With?
If the mosaic includes glass pieces, focus sealing on the grout between them using a penetrating, impregnating sealer designed for cementitious grout. Any porous or unglazed accent pieces mixed into the mosaic should get the same treatment, while the glass itself typically needs only routine cleaning.
What Is the Best Sealer for Glass Shower Doors and Walls?
A topical hydrophobic protectant works best on glass shower surfaces, since it creates a water-beading layer that cuts down on soap scum and mineral spotting. Look for a plant-based, low-VOC formula given the enclosed, poorly ventilated nature of most shower spaces, and always run a test patch first.
How Often Should You Re-Seal Grout Around Glass Tile?
Most grout sealers need reapplication every one to three years, depending on foot traffic, moisture exposure, and the product used. A simple water-bead test on the grout tells you whether the existing seal is still working or whether it's time to reapply.

