
Step by step grout restoration: Eco-friendly guide
TL;DR:
- Eco-friendly grout restoration methods are safe, effective, and reduce indoor air pollution.
- Proper surface preparation and sealing are crucial for long-lasting, resilient grout.
- Regular maintenance with biodegradable products extends grout lifespan and ensures sustainability.
Stained, cracked, or dingy grout can make even the cleanest tile surface look neglected. Whether it's a bathroom floor, a kitchen backsplash, or a commercial lobby, grout takes a beating over time. The good news is that restoring it doesn't require harsh chemicals or expensive contractors. Eco-friendly restoration methods are just as effective as conventional approaches, and they're safer for your family, your staff, and the surfaces you're protecting. This guide walks you through every stage of the process, from gathering the right supplies to long-term aftercare, so you can get lasting results without compromising your health or the environment.
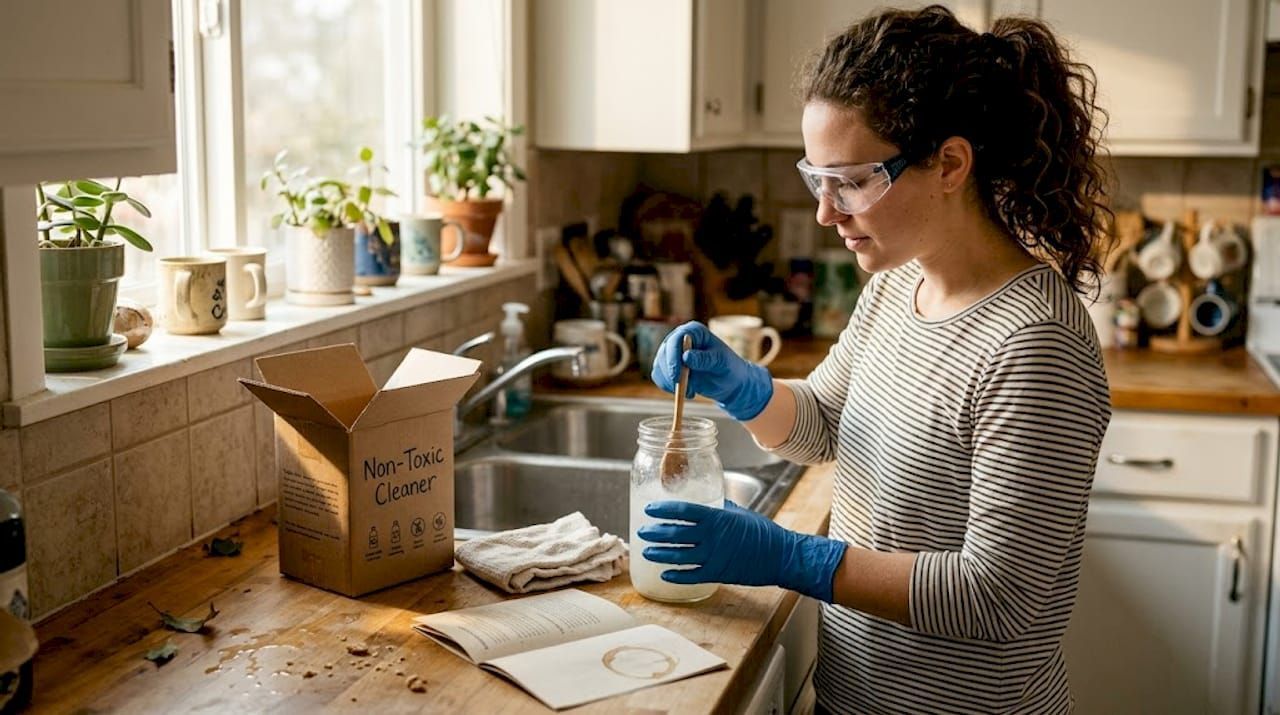
Table of Contents
- What you need for eco-friendly grout restoration
- Surface preparation: Setting the stage for success
- Step-by-step grout restoration: Eco-friendly methods
- Troubleshooting, common mistakes, and aftercare tips
- A fresh perspective: Why most grout restoration advice overlooks sustainability
- Restore and maintain grout with confidence: Eco-friendly solutions that work
- Frequently asked questions
Key Takeaways
| Point | Details |
|---|---|
| Eco-friendly prep matters | Choosing the right materials and safety gear makes grout restoration safer and greener. |
| Proper technique ensures longevity | Step-by-step cleaning, repairing, and sealing are vital for lasting, clean grout. |
| Avoid common mistakes | Skip harsh chemicals, seal thoroughly, and follow aftercare tips for best results. |
| Sustainability has lasting value | Eco-friendly methods protect both your surfaces and your property's long-term health. |
What you need for eco-friendly grout restoration
Getting the right supplies before you start saves time and prevents costly mistakes. Conventional grout restoration products often contain bleach, ammonia, or volatile organic compounds (VOCs), which release fumes that irritate the lungs and eyes. Eco-friendly alternatives skip those ingredients without sacrificing cleaning power. In fact, eco-friendly cleaning methods reduce indoor air pollution compared to harsh chemicals, making them a smarter choice for enclosed spaces like bathrooms and kitchens.
Here's what you'll need:
- Stiff-bristled grout brush (nylon, not metal)
- Plant-based or biodegradable grout cleaner
- Eco-friendly grout repair compound or epoxy filler
- Low-VOC grout colorant (optional, for color restoration)
- Biodegradable, penetrating grout sealer
- Microfiber cloths and sponges
- Bucket of clean water
- Safety glasses and nitrile gloves
- Painter's tape to protect tile edges
Conventional vs. eco-friendly products at a glance:
| Feature | Conventional products | Eco-friendly products |
|---|---|---|
| Fumes/VOCs | High | Low to none |
| Safe for kids/pets | Often not | Yes |
| Biodegradable | Rarely | Yes |
| Surface compatibility | Can etch sensitive tiles | Gentle on most surfaces |
| Effectiveness | High | Equally high |
Pro Tip: When shopping for cleaners or sealers, read the label carefully. Look specifically for terms like "non-toxic," "biodegradable," and "plant-based." Avoid anything that lists phosphates, chlorine bleach, or synthetic surfactants as active ingredients.
Safety gear still matters even with green products. Gloves protect your hands from prolonged contact with any cleaning agent, and glasses keep splashes away from your eyes. Set up your workspace by removing any rugs, furniture, or items near the tile area. Lay down a drop cloth on surrounding surfaces to catch drips. Starting clean and organized means you'll avoid accidental damage to adjacent tiles or flooring.
For a broader look at the basics of eco-friendly grout cleaning basics, it helps to understand which product categories are available before you commit to a specific brand or formula.
Surface preparation: Setting the stage for success
Skipping surface prep is the fastest way to undo all your hard work. Restoration products, especially sealers, bond best to clean, dry, and structurally sound grout. Rushing this stage leads to peeling, uneven color, and reduced durability. Proper surface prep boosts grout restoration durability, so treat this phase as seriously as the restoration itself.
Follow these steps in order:
- Remove loose debris. Sweep or vacuum the tile surface to clear dust, dirt, and loose grit before applying any liquid.
- Pre-clean grout lines. Apply your eco-friendly cleaner directly to the grout and let it dwell for 5 to 10 minutes. Scrub with your nylon brush using short, firm strokes along the grout line.
- Rinse thoroughly. Use clean water and a sponge to remove all cleaner residue. Leftover cleaner can interfere with sealer adhesion.
- Inspect for damage. Look closely for cracks, crumbling sections, or deep staining that simple cleaning won't fix. Mark problem areas with painter's tape so you don't miss them.
- Address structural damage first. Use an eco-friendly grout repair compound to fill any cracks or chips. Allow it to cure fully according to the product instructions before moving on.
- Allow complete drying. Grout must be fully dry before you apply any colorant or sealer. Depending on humidity, this can take anywhere from 2 to 24 hours.
If you're dealing with heavy buildup or mineral deposits, you may need to deep-clean grout without harsh acids using a specialized plant-based formula before moving to the restoration phase.
Safety reminder: Always ventilate the area during and after cleaning. Open windows, run exhaust fans, and keep the space aired out until surfaces are fully dry. Even non-toxic products benefit from good airflow.
Pro Tip: Before applying any cleaning solution across the whole surface, spot-test it in a small, hidden area, like behind a toilet or inside a cabinet. Wait 10 minutes and check for any discoloration or surface reaction before proceeding.
Step-by-step grout restoration: Eco-friendly methods
With a clean, dry, and inspected surface, you're ready to restore. Work in small sections of about 3 to 4 square feet at a time. This keeps products from drying out before you can work them in and gives you better control over the results.
The restoration sequence:
- Apply the eco-friendly cleaner (second pass). Even after prep, a final targeted clean helps open the grout pores for better sealer penetration. Scrub, then rinse and dry again.
- Repair any remaining damage. If you filled cracks during prep, confirm they're fully cured. Sand lightly if needed to level the surface.
- Apply grout colorant (optional). If your grout has permanent staining or you want a color refresh, apply a low-VOC grout colorant with a small brush. Work it into the grout line and wipe excess off tiles immediately with a damp cloth.
- Apply the biodegradable sealer. Use an applicator brush or bottle to apply sealer directly to the grout line. Avoid flooding the tile surface. Non-acidic cleaners and biodegradable sealers are safe for both the home and environment, making them ideal for kitchens and bathrooms.
- Allow curing time. Follow the sealer manufacturer's instructions. Most penetrating sealers need 24 to 48 hours before the surface gets wet.
Eco vs. conventional restoration comparison:
| Stage | Conventional approach | Eco-friendly approach |
|---|---|---|
| Cleaning | Bleach-based sprays | Plant-based enzyme cleaners |
| Repair | Standard epoxy filler | Low-VOC repair compound |
| Coloring | Solvent-based colorant | Water-based, low-VOC colorant |
| Sealing | Solvent sealer (high VOC) | Biodegradable penetrating sealer |
For more DIY grout restoration guidance, including product-specific tips, it's worth reviewing detailed application notes before you start sealing. After the project is complete, setting up a plan for ongoing eco-friendly grout maintenance will keep your results looking fresh for years.
Pro Tip: Work in small sections and never let the sealer pool on the tile surface. If it does, wipe it up immediately with a dry cloth. Dried sealer on tile can leave a hazy film that's difficult to remove.

Troubleshooting, common mistakes, and aftercare tips
Even careful work can hit a snag. Knowing what to watch for and how to respond quickly makes the difference between a minor setback and a full redo.
Common mistakes to avoid:
- Over-wetting the grout. Too much water during cleaning or rinsing can push dirt deeper into pores and weaken the grout structure over time.
- Skipping the sealer. Improper sealing is a top cause of grout staining and deterioration. Never skip this step after restoration.
- Using metal brushes. Metal bristles scratch tile glazing and can gouge soft grout, creating more problems than they solve.
- Applying sealer to damp grout. Moisture trapped under sealer prevents proper bonding and leads to flaking.
- Scrubbing too aggressively. Hard scrubbing on already-fragile grout can widen cracks or remove colorant you just applied.
Aftercare tips for long-term results:
- Clean grout weekly with a pH-neutral, gentle cleaner to prevent buildup.
- Reseal grout every 12 to 24 months depending on traffic and moisture exposure.
- Blot spills immediately rather than letting them sit on the surface.
- Avoid steam cleaners on freshly sealed grout for at least 30 days.
If you notice grout haze (a cloudy film on tiles after restoration), act quickly. You can remove grout haze with a targeted, non-abrasive cleaner before it hardens fully. For ongoing care, following a solid long-term grout maintenance routine prevents the need for full restoration more than once every few years.
Also, be sure to avoid grout sealer mistakes by reviewing application best practices before each resealing session.
Pro Tip: Keep a simple maintenance log, either a notes app or a sticky note inside a cabinet, recording the date you cleaned and sealed each area. This removes the guesswork and helps you stay on schedule without over or under-treating your surfaces.
A fresh perspective: Why most grout restoration advice overlooks sustainability
Most restoration guides jump straight to product recommendations without questioning whether those products belong in your home at all. The default assumption in the industry has long been that stronger equals better. Bleach, acid-based cleaners, and solvent sealers dominate store shelves because they work fast and the results are visible immediately. But fast and visible isn't the same as safe or lasting.
What we've seen time and again is that homeowners and property managers who switch to eco-friendly products don't just get cleaner grout. They get fewer headaches, fewer respiratory complaints from staff, and surfaces that hold up longer because gentler chemistry doesn't degrade the grout structure over repeated use. Harsh acids, in particular, can microscopically etch grout with each application, making it more porous and more prone to staining the next time around.
Sustainability in grout care isn't a trade-off. It's a long-term investment. Choosing eco-friendly maintenance products means you're not just protecting your tile today. You're reducing the frequency of full restorations, lowering chemical exposure for everyone in the building, and making a choice that holds up under scrutiny. That's not a compromise. That's a smarter standard.
Restore and maintain grout with confidence: Eco-friendly solutions that work
You've done the hard work of learning the right process. Now it's time to pair that knowledge with products that actually deliver. At Oceancare Store, every product in our lineup is designed with the same priorities you've read about here: effective, biodegradable, and safe for the surfaces and people you care about.
Browse our range of stone and grout sealers for penetrating, low-VOC protection that keeps grout sealed and stain-resistant season after season. Our biodegradable grout cleaner handles routine maintenance without the chemical trade-offs. And if your project extends to pool areas, check out our pool tile restorer for surfaces that need a little extra attention. Every product is ready to work as hard as you do, without the environmental cost.
Frequently asked questions
What is the most eco-friendly way to clean grout?
The safest and most eco-friendly option is to use biodegradable, non-acidic cleaners combined with a stiff nylon brush and warm water. These eco-friendly cleaning methods reduce indoor air pollution compared to harsh chemicals and are safe for regular use in any room.
Do I need to seal my grout after restoration?
Yes, sealing is essential. Improper sealing is a top cause of grout staining and deterioration, so applying a biodegradable penetrating sealer after restoration protects your work and extends the life of the grout significantly.
How can I maintain grout so it stays clean longer?
Regular cleaning with pH-neutral products and scheduled resealing every 12 to 24 months keeps grout in top shape. Following a step-by-step grout cleaning routine prevents heavy buildup from developing between full restoration sessions.
Is eco-friendly grout restoration safe for all tile types?
Biodegradable and non-toxic products are gentle enough for most tile types, including ceramic, porcelain, and natural stone. That said, always test a small area first to confirm compatibility before treating the full surface.

