
Eco-friendly bathroom tile sealing guide: lasting results
TL;DR:
- Proper sealing with eco-friendly products prevents grout discoloration, stains, and mold buildup.
- Preparation involves thorough cleaning, damage repair, and full drying before applying the sealer.
- Regular water drop tests guide resealing frequency to maintain tile and grout protection.
Grout that turns gray within months, water stains creeping across tile surfaces, and mold settling into corners are frustrating realities for homeowners and property managers alike. The good news is that a proper sealing routine can stop all of that before it starts. Better yet, you do not need harsh chemicals to get the job done. This guide walks you through every step of sealing bathroom tiles using eco-friendly, low VOC, and water-based products that protect your surfaces without harming your household or the environment. Whether you manage one bathroom or an entire property, these steps will save you time, money, and unnecessary chemical exposure.
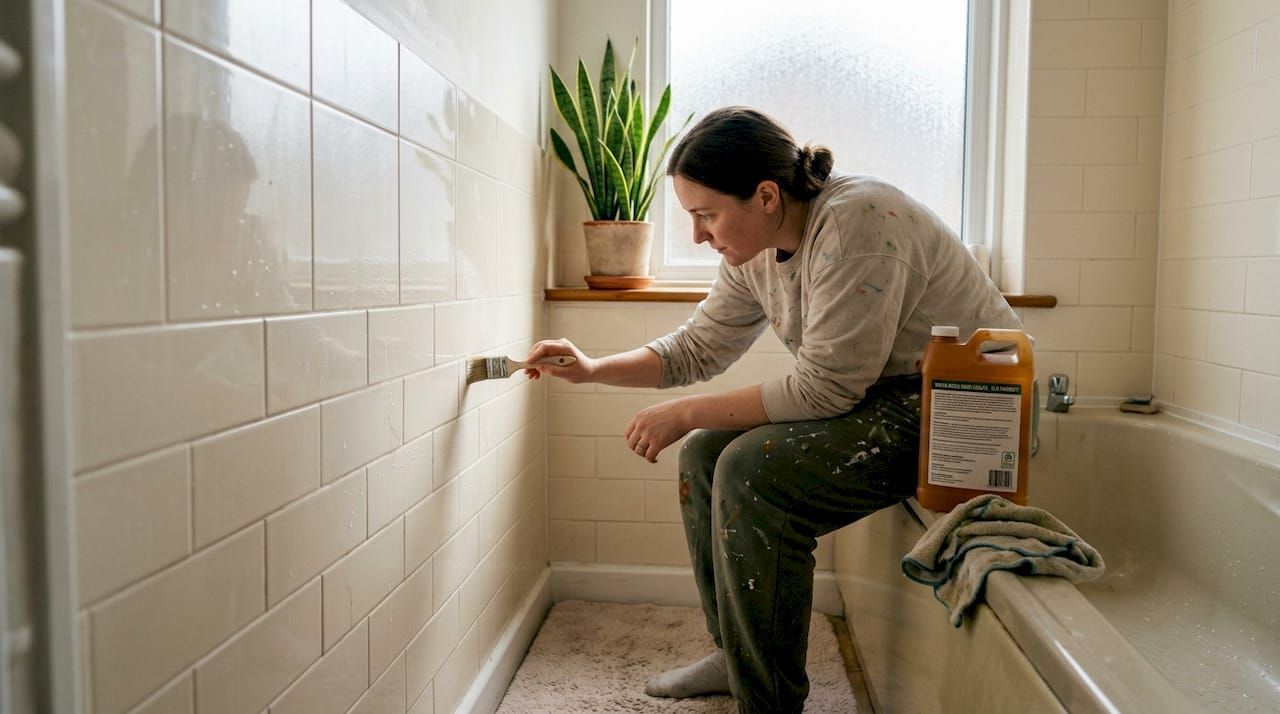
Table of Contents
- Essential tools and materials for tile sealing
- Step-by-step preparation for bathroom tile sealing
- Applying eco-friendly grout and tile sealer correctly
- Testing, troubleshooting, and maintaining sealed tiles
- A sustainable approach to bathroom tile longevity
- Eco-friendly surface solutions for your bathroom
- Frequently asked questions
Key Takeaways
| Point | Details |
|---|---|
| Prep tiles carefully | Clean, repair, and dry tiles for 24-48 hours before sealing for best results. |
| Use water-based sealers | Choose eco-friendly, water-based sealers to protect bathroom surfaces sustainably. |
| Verify sealing effectiveness | Perform a water drop test after sealing; reseal if water doesn't bead up. |
| Reseal regularly | Schedule resealing every 6-12 months for wet, high-use bathroom areas. |
Essential tools and materials for tile sealing
Before you touch a single tile, you need the right supplies. Rushing into sealing without proper materials is one of the most common reasons the job fails. Gathering everything upfront also means fewer interruptions and a cleaner result.
Here is what you will need:
- pH-neutral tile cleaner (plant-based or biodegradable formulas preferred)
- Eco-friendly penetrating sealer (water-based, low VOC)
- Grout repair kit for chips or cracks
- Soft-bristle brush or foam applicator
- Clean sponges and microfiber cloths
- Painter's tape to protect fixtures
- Bucket and warm water
- Gloves (even with non-toxic products, skin protection matters)
The most important product decision you will make is choosing between a water-based sealer and a solvent-based sealer . Here is a quick comparison:
| Feature | Water-based sealer | Solvent-based sealer |
|---|---|---|
| VOC levels | Low | High |
| Drying time | 1-2 hours | 2-4 hours |
| Eco impact | Minimal | Significant |
| Indoor safety | High | Lower |
| Durability | Good | Very good |
| Recommended use | Bathrooms, kitchens | Outdoor, heavy traffic |
For bathroom use, water-based eco grout sealers consistently outperform solvent-based options in terms of safety and sustainability. They penetrate grout effectively, resist moisture, and do not off-gas harmful fumes in enclosed spaces like bathrooms.
When selecting your sealer, look for products labeled biodegradable, plant-derived, or certified low VOC. These are not just marketing terms. They reflect real differences in how the product interacts with your indoor air quality and local water systems when rinsed away.
For tile surfaces specifically, a penetrating sealer (also called an impregnating sealer) works by soaking into the pores of the material rather than sitting on top. This means it does not change the appearance of your tile and offers longer-lasting protection. You can learn more about maintaining tile floors to understand how product selection affects long-term results.
If you are working with natural stone tiles like marble or travertine, the stakes are even higher. Harsh chemicals can etch the surface permanently. Choosing sustainable stone sealers designed for sensitive materials is non-negotiable in those cases. Following eco cleaning best practices from the start sets the foundation for a safer, more effective process.
Step-by-step preparation for bathroom tile sealing
Preparation is where most DIY sealing jobs either succeed or fail. Skipping this stage means your sealer will not bond properly, and you will be back to square one within weeks.
Follow these steps in order:
- Clear the area. Remove all toiletries, rugs, and accessories. Good airflow and access to every tile surface matters.
- Clean thoroughly with a pH-neutral cleaner. Apply your plant-based cleaner to all tile and grout surfaces. Scrub grout lines with a soft-bristle brush. Rinse completely and repeat if needed.
- Inspect for damage. Look for cracked grout, chipped tiles, or areas where grout has crumbled. Mark these spots with tape.
- Repair all damage before sealing. Use a grout repair kit or color-matched grout to fill cracks and chips. Sealing over damaged grout locks in the problem rather than solving it.
- Allow full drying time. Drying for 24-48 hours before sealing ensures the sealer penetrates properly rather than sitting on a damp surface.
- Tape off fixtures. Use painter's tape around faucets, drains, and baseboards to keep sealer off surfaces it should not touch.
The drying window is often underestimated. Even if the tile feels dry to the touch after a few hours, moisture can still be trapped in the grout. Sealing too early traps that moisture underneath, which can lead to mold growth or sealer failure.
Pro Tip: Run a bathroom exhaust fan or open a window during cleaning and drying. Improved airflow cuts drying time and prevents mildew from forming before you even start sealing.
One mistake many homeowners make is using acidic cleaners like vinegar or bleach-based products before sealing. These can weaken grout and leave a residue that blocks sealer absorption. Review avoiding grout sealer mistakes to make sure your prep work does not undo your effort. For a full walkthrough of safe cleaning methods, the eco grout cleaning guide covers every detail.
For commercial bathrooms, inspection and commercial bathroom standards recommend that surfaces be fully clean and structurally sound before any sealing product is applied. The same principle applies at home.
Applying eco-friendly grout and tile sealer correctly
With clean, dry, and repaired surfaces ready, it is time to apply the sealer. Precision here makes the difference between a surface that holds up for years and one that needs resealing within months.
Follow these steps for a clean, effective application:
- Shake or stir your sealer. Some water-based formulas settle during storage. A quick stir ensures even consistency.
- Apply to grout lines first. Use a narrow foam brush or applicator bottle to work the sealer directly into grout lines. Work in small sections so the sealer does not dry before you spread it.
- Move to tile surfaces. For porous tiles, apply sealer with a sponge in circular motions. Non-porous tiles like glazed ceramic generally do not need sealing, but grout between them always does.
- Allow dwell time. Let the sealer sit for 5-15 minutes dwell time so it penetrates the surface properly.
- Wipe away excess. Use a clean microfiber cloth to remove any sealer sitting on top of tile surfaces. Leftover sealer dries into a hazy film that is difficult to remove.
- Perform the water bead test. Sprinkle a few drops of water on the sealed surface. If water beads up, the sealer is working. If it absorbs or darkens the grout, apply a second coat.
Pro Tip: Work in sections of about two to three square feet at a time. This prevents the sealer from drying unevenly and gives you better control over coverage.
For eco-friendly sealing techniques, the key is patience. Do not rush the dwell time or skip the wipe-down step. Excess sealer left on tile surfaces causes the grout haze that frustrates so many homeowners after the job is done. If that happens, check out tips for removing grout haze before the residue hardens.
For timeless surface protection , choosing the right product and applying it carefully is far more effective than applying more coats of a lower-quality sealer.
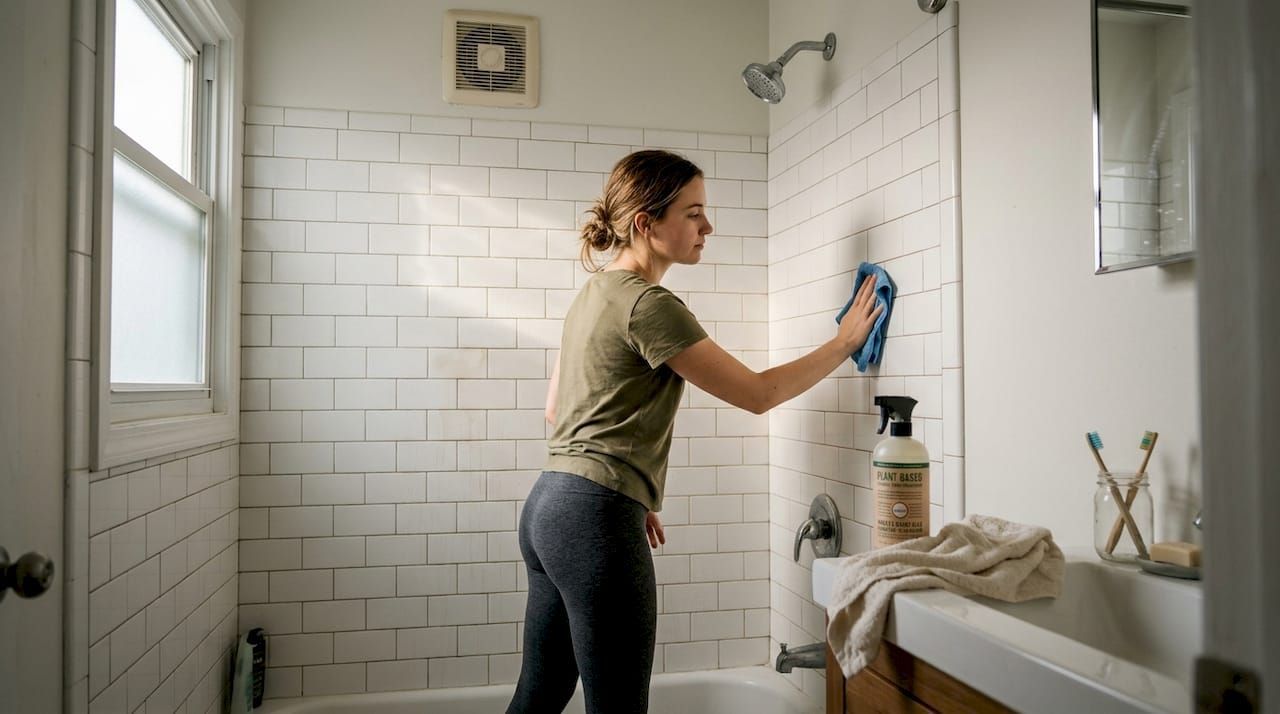
Testing, troubleshooting, and maintaining sealed tiles
Sealing is not a one-time event. Testing your results and scheduling maintenance keeps your bathroom surfaces protected year after year.
The water drop test is your most reliable quality check. Sprinkle water on sealed grout and tile surfaces. Water beads up when the sealer is effective. If the water soaks in or darkens the surface, the sealer has either worn off or was not applied correctly.
Here is a quick reference for resealing schedules based on area use:
| Area type | Recommended resealing frequency |
|---|---|
| Shower walls and floors | Every 6-12 months |
| Bathroom floor (high traffic) | Every 6-12 months |
| Bathroom floor (low traffic) | Every 1-2 years |
| Backsplash or vanity area | Every 2-3 years |
Resealing frequency for high-use wet areas like showers should be every 6-12 months, while less-used surfaces can go 1-3 years between applications.
Common troubleshooting scenarios:
- Water absorbs immediately: Sealer was not applied or has fully worn off. Clean, dry, and reseal.
- Grout looks darker after sealing: Moisture was trapped during application. Strip the sealer and allow more drying time before reapplying.
- Hazy film on tile surface: Excess sealer was not wiped away in time. Use a sealer remover or follow the steps for eco-friendly grout maintenance.
- Sealer peeling or flaking: Surface was not clean enough before application. Adhesion requires a completely residue-free surface.
"Test sealing effectiveness with a water drop test: if water beads up, sealer is effective; if absorbed or darkens the surface, reseal."
For ongoing care, use only pH-neutral, plant-based cleaners for routine bathroom cleaning. Harsh chemicals break down sealer faster and shorten the time between resealing. Understanding tile cleaning frequency helps you build a maintenance schedule that protects your investment without overworking the surface.
A sustainable approach to bathroom tile longevity
Here is something the tile industry does not talk about enough: switching to water-based, eco-friendly sealers is not a compromise. It is an upgrade. Many homeowners assume that lower VOC means lower performance, but that thinking is outdated. Modern water-based formulas offer comparable protection to solvent-based products, with far less environmental and health impact.
The real shift we encourage is moving from reactive maintenance to preventative care. Most tile damage happens because small problems like worn sealer or hairline grout cracks go unnoticed until water has already worked its way in. Annual testing with a simple water drop check takes less than five minutes and tells you everything you need to know.
For property managers, annual inspections using water tests for commercial bathrooms help meet health standards and reduce long-term maintenance costs. The same logic applies to residential properties. Catching sealer failure early costs a fraction of what grout replacement or tile repair does later.
Investing in sustainable stone and grout protection also signals a broader commitment to responsible property care. Eco-friendly products protect your surfaces, your household, and the water systems that eventually receive your cleaning runoff. That is a return on investment that goes well beyond tile aesthetics.
Eco-friendly surface solutions for your bathroom
You now have a clear, step-by-step process for sealing bathroom tiles the right way using products that are safe for your family and the environment. The next step is making sure you have the right supplies to follow through.
At
Oceancare, we offer a curated range of eco bathroom tile protection products including water-based penetrating sealers, biodegradable grout cleaners, and low VOC surface protectors designed specifically for bathrooms and wet areas. Our
eco bathroom cleaners are plant-based, acid-free, and safe for natural stone, ceramic, and porcelain. Whether you are sealing for the first time or refreshing an existing surface, we have everything you need to do it sustainably and effectively.
Frequently asked questions
How long should bathroom tile dry before applying sealer?
Bathroom tile and grout should dry for 24-48 hours before sealing to allow full moisture evaporation and ensure the sealer bonds and penetrates properly.
What is the best way to test if my tiles are sealed?
Use the water drop test: sprinkle a few drops of water on the surface, and if water beads up the sealer is working. If water soaks in or darkens the grout, it is time to reseal.
How often should I reseal grout and tiles in a bathroom?
High-use wet areas like showers need resealing every 6-12 months, while lower-traffic surfaces such as backsplashes can typically go 1-3 years between applications.
What eco-friendly sealer options are recommended for bathrooms?
Penetrating water-based eco sealers are the safest and most sustainable choice for bathroom surfaces, offering strong moisture protection with minimal VOC emissions and environmental impact.
Recommended

