
10–15 Minute Water Test for Homeowners Before Sealing Marble Counters
If a few drops of water sit on your marble and darken the stone within a couple of minutes, the surface needs sealing now. If the water beads up and rolls off, you're covered. Run the water test first, then reach for a penetrating (impregnating) sealer, not a topical film former, for a kitchen countertop that gets used daily.
TL;DR:
- Use a water test on multiple spots, especially in high-traffic areas, to determine if your marble needs sealing or resealing soon.
- Clean the surface thoroughly with a pH-neutral stone cleaner and allow 24 to 48 hours to dry before applying sealer to avoid bonding issues.
- Apply a generous, even coat of a penetrating sealer in small sections, then wipe off excess within the specified absorption window to prevent hazy films.
- Reseal kitchen marble every 6 to 18 months, with frequency depending on usage and water test results, and spot-reseal only affected areas.
- Choose low-VOC, plant-based penetrating sealers for safer, breathable protection, especially in households with children, pets, or sensitivities.
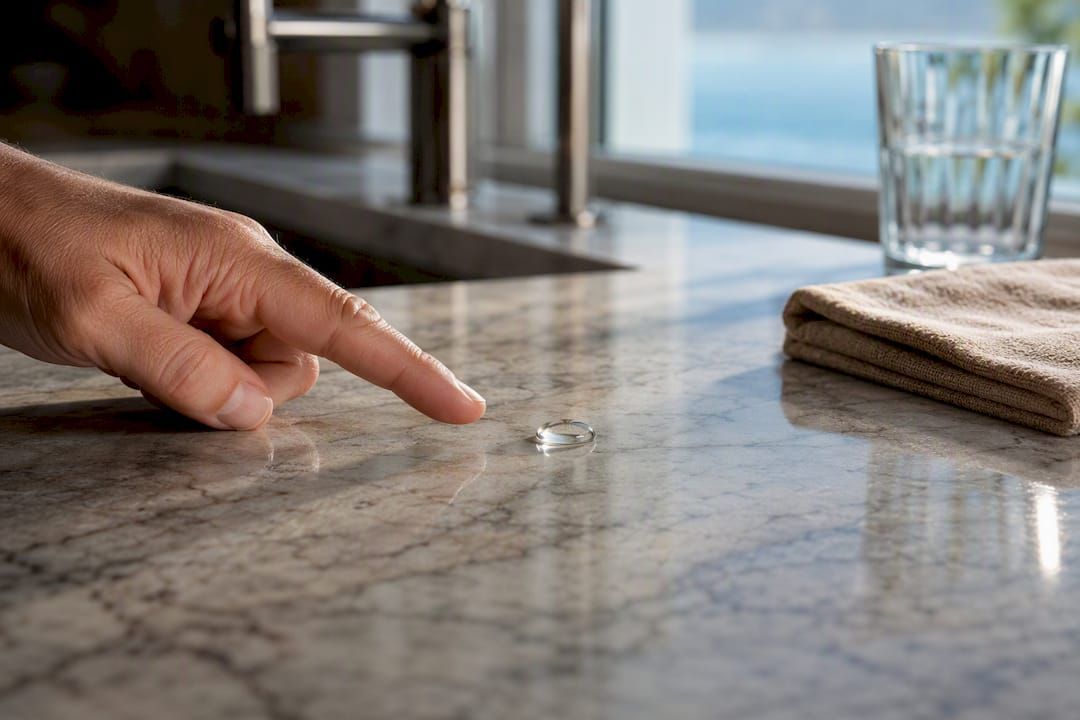
Table of Contents
- How Do You Run a Marble Water Test?
- What Should You Do Before Sealing Marble?
- How Do You Seal a Marble Countertop Step by Step?
- Which Sealer Type Actually Belongs on a Countertop?
- How Often Should You Reseal Marble Countertops?
- Why Is Your Marble Still Staining After Sealing?
- An Editorial Take on Low-VOC Sealers and When They're Enough
- Where to Buy a Food-Safe Marble Sealer
- Sources
How Do You Run a Marble Water Test?
Pick a spot near the sink or stove, since those areas take the most abuse. Wipe the section clean and let it dry completely, then place a few drops of water on the stone.
Wait 10 to 15 minutes and check back. According to the Natural Stone Institute, this simple bead test tells you almost everything you need to know about your seal's condition:
- Water beads up and stays put: the existing seal is intact. No action needed yet.
- Water soaks in and darkens the stone within a few minutes: the marble is unsealed or the seal has failed. Time to reseal.
- Water darkens the stone slowly, over 10 to 15 minutes: the seal is thinning. Plan to reseal soon, but you're not in crisis mode.
Test more than one spot. High-traffic zones like the area around the sink wear faster than a rarely touched end of the counter. If your countertop was fabricated and sealed by a professional, don't assume it's protected forever. Retest after any deep cleaning, polishing, or repair work, since those processes can strip a factory seal without you noticing.
What Should You Do Before Sealing Marble?
Sealer only works when it can actually soak into clean, dry stone. Skip prep and you'll trap grime under the sealer or end up with a hazy, uneven finish that's hard to fix.
Start with a full clean using a pH-neutral stone cleaner. Skip anything acidic, since vinegar, lemon juice, and most all-purpose sprays will etch marble on contact and dull the surface right before you seal it. That answers a question a lot of homeowners ask: can you use vinegar on stone? No. Vinegar on marble, or on any calcium-based stone, causes a chemical reaction that eats into the surface. Save it for your salad dressing, not your countertop.
After cleaning, give the stone real time to dry. Professional guidance generally calls for a 24 to 48 hour drying window before sealing, especially if the marble was recently cleaned, polished, or exposed to water. Sealing over even slightly damp stone traps moisture underneath the sealer and can cause cloudy patches or poor bonding.
Before you start applying anything:
- Mask off edges, backsplashes, and adjacent surfaces with painter's tape.
- Cover or plug the sink to keep sealer out of the drain.
- Open a window or run a fan. Most sealers carry fumes strong enough to bother sensitive noses in a closed kitchen.
- Wear gloves if the product label recommends skin protection.
Pro Tip: Run your hand flat across the whole surface before sealing. If you feel any grit, residue, or tackiness, reclean it. Sealer applied over even a thin film of cleaning residue will lock that residue in permanently.
How Do You Seal a Marble Countertop Step by Step?
Once your water test says "seal it" and the surface is clean and bone dry, the actual application is the easy part. Here's the sequence that gives you even coverage without waste or streaking.
1. Do a final clean pass. Wipe the entire countertop with a pH-neutral stone cleaner one more time, right before you seal. This catches any dust or fingerprints that settled since your deep clean, and it takes only a few minutes.
2. Confirm the surface is fully dry. Don't rush this step. A pH-neutral cleaner followed by a full 24 to 48 hour dry time gives the penetrating sealer the best shot at soaking in evenly rather than sitting on a damp surface.
3. Work in small sections. Divide the countertop into roughly 3 foot by 3 foot zones. Trying to seal the whole counter at once means the sealer on the first section will start drying before you've even finished applying it elsewhere.
4. Apply a generous, even coat. Use a clean, lint-free cloth or an applicator pad and follow the manufacturer's instructions on how much product to use per section. Most penetrating sealers want a liberal coat, not a light misting.
5. Let it absorb for the specified window. Every product label lists an absorption time, typically somewhere between 5 and 20 minutes. This is where the sealer actually does its job, soaking into the stone's pores rather than sitting on top of it.
6. Wipe off every trace of excess before it dries. This is the step most DIYers rush, and it's the one that causes the most problems. Sealer left to dry on the surface creates a hazy film that's genuinely difficult to remove and sometimes requires a dedicated sealer stripper to correct. Buff with a dry microfiber cloth until the surface feels clean and slightly cool to the touch, not sticky.
7. Decide if you need a second coat. Honed or heavily used marble often benefits from a second application, applied the same way once the first coat has cured. Polished marble usually needs only one coat, since its tighter surface absorbs less product.
8. Respect the cure window before using the counter. Manufacturer cure times vary, but a common range is 24 hours before light use and up to 48 to 72 hours for a full cure. Keep water, oil, and cutting boards off the surface until that window passes.
Pay extra attention to edges, sink cutouts, and seams. These spots get missed constantly because they're harder to reach with a flat applicator, and they're exactly where water tends to pool. A small foam brush works better than a cloth for tight corners around a sink cutout.
Pro Tip: Keep a spare rag dedicated only to buffing off excess sealer. Using the same cloth you cleaned with earlier can redeposit grime right back onto the wet sealer.
Which Sealer Type Actually Belongs on a Countertop?
Not all stone sealers work the same way, and picking the wrong category is one of the most common mistakes homeowners make.
Penetrating (impregnating) sealers soak into the stone's pores rather than sitting on the surface. They're invisible, allow the stone to breathe, and are the type generally recommended for kitchen marble, since they don't trap moisture or change how the stone looks. If you're wondering what a marble sealer for countertops should actually be, this is it. A quality water based marble sealer in this category is also usually the lowest odor option, which matters if you're sealing in a kitchen you'll be cooking in the same week.
Topical sealers form a visible film on top of the stone. They can add shine, but that film wears unevenly with foot traffic or heavy counter use, requires periodic stripping and reapplication, and tends to look patchy long before a penetrating sealer would need attention. These are far more common on floors than on counters.
Enhancing sealers are a penetrating sealer with pigment or a color additive mixed in. They deepen the marble's natural veining and give it a permanent "wet look." Only reach for one of these if you actually want that visual change, since the effect doesn't wash off.
Your finish matters as much as the sealer type:
- Honed marble has a matte, more porous surface and generally needs resealing closer to every 6 to 12 months in an active kitchen.
- Polished marble is denser and less absorbent, often stretching to 12 to 24 months between seals, but its glossy surface shows application errors, streaks, and haze far more obviously than honed stone does.
Some professional grade penetrating sealers use advanced polymer chemistry and promise years of protection, but they demand a completely dry substrate and careful buffing to perform as advertised. A more forgiving consumer penetrating sealer is usually the better call for a first-time DIY job, even if it means resealing a bit sooner.
How Often Should You Reseal Marble Countertops?
Reseal schedules depend on how the counter gets used, not a fixed calendar date. These ranges give you a starting point:
- Kitchen countertops: every 6 to 18 months, depending on how often you cook and clean.
- Bathroom vanities: every 2 to 3 years, since they see less acidic contact than a kitchen.
- Low-use surfaces like a bar top or display shelf: every 3 to 5 years.
Don't just guess based on the calendar. Run the same water bead test every 6 months if your kitchen counter gets heavy daily use, and check quarterly around the sink specifically, since that spot fails first.
If only one section is absorbing water while the rest still beads, you don't need to redo the whole counter. Spot-reseal just that area. Full resealing only makes sense once the majority of the surface fails the test, or once you notice etching and dullness spreading across most of the visible surface.
Why Is Your Marble Still Staining After Sealing?
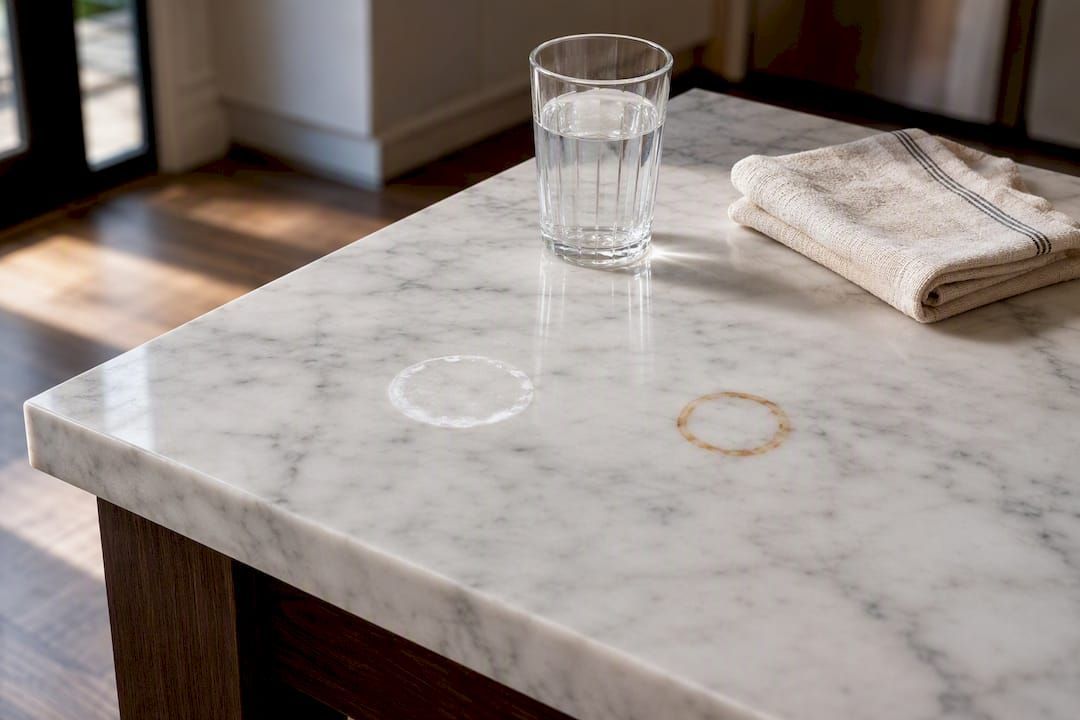
A sealed countertop that still shows dark blotches after a spill is confusing until you understand what sealer actually does. It buys you time to wipe up a mess before it soaks in. It does not stop etching, since sealers reduce absorption but have no effect on the acid reaction that dulls marble on contact with citrus, wine, or vinegar. If your countertop has a dull, matte patch where a glass sat, that's etching, not staining, and it needs polishing to fix, not resealing.
For an actual haze left behind by dried sealer, wipe with a clean cloth and a little mineral spirits or the manufacturer's recommended remover, and if that doesn't clear it, a dedicated sealer stripper is your next step.
Organic stains, like coffee rings or fruit juice, sometimes respond to a poultice: a paste made from baking soda and water, applied thickly, covered with plastic wrap, and left for 24 hours before scraping away. Test any poultice on a hidden section first, and always wear gloves when handling stripping products.
Routine care after sealing is simple. Wipe spills immediately, and clean daily with a pH-neutral stone cleaner rather than whatever multipurpose spray is under the sink. That single habit does more for a sealed counter's lifespan than almost anything else you can do.
Pro Tip: Keep a bottle of pH-neutral cleaner right next to the sink. If it's not convenient, you'll reach for the grocery-store glass cleaner instead, and that's how etching happens.
An Editorial Take on Low-VOC Sealers and When They're Enough
The stone care industry has spent years pushing solvent-heavy sealers as the only "serious" option, and that's overdue for a correction. A plant-based, low-VOC penetrating sealer does the same core job, soaking into the stone and blocking absorption, without filling your kitchen with fumes strong enough to give you a headache while you cook dinner that same week.
For a household with kids, pets, or anyone sensitive to strong chemical smells, that difference isn't cosmetic. It's the difference between resealing on a Saturday morning and being able to use the kitchen by Saturday afternoon.
Where I'd push back on the marketing hype: no eco-friendly formula changes the laws of chemistry. If your marble is extremely porous, honed, and sees heavy daily acid exposure from cooking, you may still need a second coat or a shorter reseal interval regardless of which sealer you buy. Low-VOC doesn't mean lower performance, but it doesn't mean skipping the water test either. Test first, always. The product you choose second.
Where to Buy a Food-Safe Marble Sealer
Everything covered above points to one product category: a penetrating sealer that's genuinely safe to use in a kitchen you cook in every day. Oceancarestore's stone and grout sealers are built as low-VOC, plant-based penetrating formulas, which means you get the invisible, breathable protection this guide recommends without the harsh fumes that send you out of the kitchen for a full day.
A standard bottle of penetrating sealer typically covers a kitchen countertop with enough left over for touch-ups around the sink and edges, and the application steps generally include: clean, dry, apply, buff off excess, and respect the cure window before use. If you've run into haze or uneven absorption with a sealer before, the common problems with stone sealers guide walks through what usually causes it. Run your water test today, and if your marble needs help, order a bottle sized for your counter and have it sealed by the weekend.
Sources
A few sources back the guidance in this guide, and each is worth a closer look if you want to dig deeper into your own countertop situation.

