
Must-Know Grout Facts for Every DIY Tile Project
Grout is the filler material packed between tiles to lock them in place, seal out moisture, and give a finished surface its final look. It does three jobs at once: structural, protective, and aesthetic. Get it right and your tile installation can last decades. Get it wrong and you're looking at cracked joints, water damage, and a full redo.
Here's what grout actually does in a tile installation:
- Stabilizes tiles by filling gaps and preventing individual tiles from shifting under foot traffic or thermal movement
- Resists moisture by sealing the joints between tiles, blocking water from reaching the substrate beneath
- Prevents mold and mildew by eliminating the open cavities where moisture and organic debris collect
- Completes the aesthetic by defining the visual lines of a tile layout, whether you want them to disappear or stand out
- Distributes load across the tiled surface, reducing stress on individual tiles in high-traffic areas
According to the National Tile Authority, proper grout selection and application can significantly extend tile lifespan. Poor choices lead to tile shifting, cracking, and structural failure. These must-know grout facts give you the foundation to avoid those outcomes.
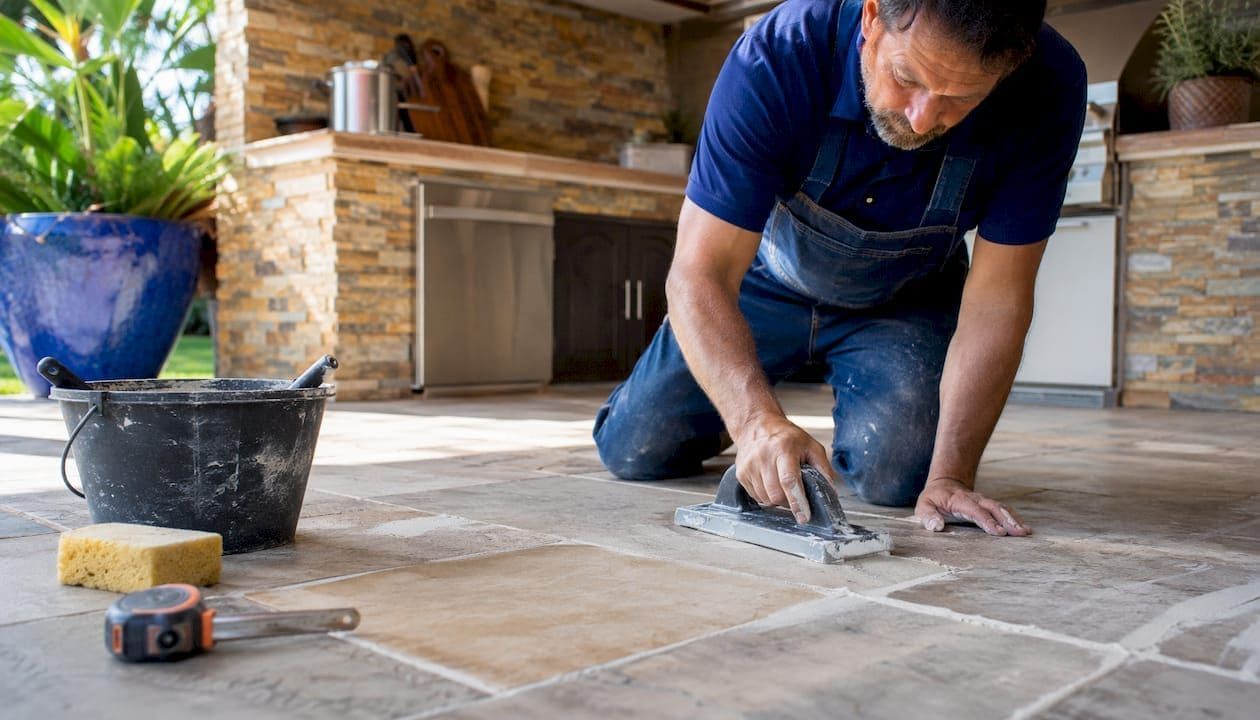
What are the main types of grout you should know?
Four grout categories cover the vast majority of residential tile projects: sanded cement-based, unsanded cement-based, epoxy, and polymer-modified cement grout. Each one has a specific job, and using the wrong type for your application is one of the most common grout mistakes homeowners make.
Sanded cement-based grout
Sanded grout is a cement-based product with fine sand added to the mix. That sand creates a mechanical bond within the joint, making the grout resistant to cracking and shrinking. Use it for any joint wider than 1/8 inch, which covers most floor tile installations, ceramic tile, and natural stone with larger gaps.
Key characteristics:
- Best for joints wider than 1/8 inch
- Highly durable under foot traffic and heavy loads
- Sets slower than epoxy, giving you more working time
- Absorbs moisture, so sealing is required in wet areas
- Can scratch polished or delicate tile surfaces during application
Unsanded cement-based grout
Unsanded grout skips the sand, giving it a smoother, stickier consistency. That stickiness is actually useful on vertical surfaces like shower walls because the grout stays put during application. The trade-off is that without sand as a binder, unsanded grout shrinks when used in joints wider than 1/8 inch, which causes cracking.
Key characteristics:
- Designed for joints between 1/16 and 1/8 inch wide
- Smooth texture won't scratch polished marble or glass tile
- Easier to work with on walls and vertical surfaces
- Requires sealing in moisture-prone areas
- Not suitable for floor joints wider than 1/8 inch
Epoxy grout
Epoxy grout is a two-part system: a resin base and a hardener. When combined, a chemical reaction begins and you have a limited window to finish the job before it sets. That fast cure time makes epoxy grout trickier to work with, which is why many professionals recommend hiring an experienced installer for epoxy projects. The payoff is a non-porous, stain-resistant joint that doesn't need sealing and holds up against harsh cleaners, moisture, and food acids.
Key characteristics:
- Non-porous and inherently stain resistant
- No sealing required, ever
- Most expensive grout option
- Fast set time demands efficient, practiced application
- Can yellow on exterior applications exposed to UV light
- Ideal for kitchens, bathrooms, and commercial food-service areas
Polymer-modified cement grout
Polymer-modified grout introduces latex polymers into a standard cement formula. The result is a grout with better flexibility, improved color consistency, and stronger moisture resistance than basic cement grout. It's available in both sanded and unsanded versions, making it a versatile upgrade for homeowners who want cement grout performance with added durability.
Key characteristics:
- Available in sanded and unsanded formulas
- Better color consistency than standard cement grout
- Improved flexibility handles minor substrate movement
- Good choice for bathroom renovations, backsplashes, and high-traffic floors
- Costs more than standard cement grout but less than epoxy
Pro Tip: If you're tiling a kitchen backsplash with joints under 1/8 inch, unsanded polymer-modified grout gives you the best of both worlds: smooth application and better stain resistance than basic unsanded cement grout.
Which specialty grout options expand your design possibilities?
Beyond the four main categories, a handful of specialty grout types open up creative and functional options that standard cement or epoxy products can't match. These aren't gimmicks. Each one solves a specific problem or achieves an effect that conventional grout simply can't.
- Translucent grout is formulated to let light pass through the joint, making it ideal for glass tile installations where opaque grout would block the tile's luminosity. It preserves the visual depth of glass mosaic work and is typically used in decorative backsplashes and feature walls.
- Glow-in-the-dark grout contains phosphorescent pigments that absorb light and emit a soft glow in the dark. Beyond the obvious novelty appeal in kids' bathrooms or accent walls, it has a practical safety application in pool surrounds and outdoor pathways where low-light navigation matters.
- Latex-modified grout blends liquid latex into a cement base, giving the cured joint a degree of elasticity that standard cement grout lacks. This flexibility makes it well suited to areas that experience thermal expansion and contraction, such as outdoor patios, sunrooms with large temperature swings, and floors over wood subfloors that flex underfoot.
- Furan resin grout is a specialized industrial product made from polymers of furfuryl alcohol. It resists acids, abrasion, and continuous heat exposure up to 350°F, which makes it the go-to choice for commercial dairies, food processing facilities, and chemical plants. It requires special installation techniques and is not a practical DIY option.
- Additive-enhanced grouts use antimicrobial additives, color-lock pigments, or chemical-resistance agents blended into a standard cement or epoxy base. Antimicrobial versions are popular in healthcare settings and high-humidity bathrooms. Color-lock formulas resist UV fading in outdoor applications.
For DIY inspiration, here are some practical specialty grout applications:
- Glass mosaic shower niche: translucent grout preserves the tile's reflective quality
- Pool coping and steps: glow-in-the-dark grout for nighttime visibility
- Sunroom floor over a wood subfloor: latex-modified grout to handle seasonal movement
- Outdoor kitchen backsplash: UV-stable, color-lock additive grout to prevent fading
- Bathroom floor with antimicrobial grout: reduces mold growth between cleanings
How does grout color shape the look and maintenance of your tile?
Grout color is one of the most underestimated design decisions in a tile project. The same tile laid with white grout versus charcoal grout looks like two completely different installations. Color choice also directly affects how much time you'll spend cleaning, which is a practical consideration that often gets ignored until it's too late.
The three main directions for grout color:
- Matching grout blends the joint into the tile, letting the tile itself dominate the visual field. This works well for patterned or handmade tiles where you want the eye to follow the tile's surface, not the grid of joints.
- Contrasting grout highlights the layout pattern by making every joint visible. A white subway tile with dark charcoal grout is the classic example. It's a bold choice that draws attention to the geometry of the installation.
- Neutral grout sits between matching and contrasting. It adds subtle definition without competing with the tile, and it tends to age gracefully across changing décor trends.
From a maintenance standpoint, light-colored grout shows stains more readily if not properly sealed and maintained. Darker grout hides everyday grime better but carries its own risks: it can fade over time and, critically, it can stain lighter-colored or crackle-glazed tiles during application if grout release isn't used. That's a permanent problem if you skip the prep step.
Factors to weigh when choosing grout color:
- Traffic and use: High-traffic floors and kitchen backsplashes accumulate grease and grime fastest. Mid-tone grays and tans hide daily buildup better than white.
- Tile finish: Crackle glazes, unglazed stone, and porous tiles absorb pigment from dark grout. Always test a small area first.
- Maintenance commitment: White grout in a shower looks stunning on day one. Keeping it that way requires consistent weekly cleaning and annual resealing.
- Room size: Light grout in a small bathroom makes the space feel larger by reducing visual interruption between tiles.
- Long-term fading: Darker grout colors tend to fade with repeated cleaning, especially if acidic or bleach-based cleaners are used.
Pro Tip: Before committing to a grout color, buy a small sample and apply it to a scrap tile or an inconspicuous corner. Let it cure fully, then view it in both natural and artificial light. Grout colors shift significantly as they dry, and what looks right wet often looks wrong once cured.
What installation factors determine whether your grout actually lasts?
The quality of a grout job depends as much on preparation and technique as it does on the product you choose. Three factors consistently separate installations that hold up for decades from ones that fail within a few years: joint sizing, grout release, and proper curing.
Getting joint size right
Joint width determines which grout type you can use, and it also affects how the finished installation looks and performs. Sanded grout belongs in joints wider than 1/8 inch. Unsanded grout covers joints between 1/16 and 1/8 inch. Going outside those ranges causes problems: sanded grout in a narrow joint puts pressure on tile edges, while unsanded grout in a wide joint shrinks and cracks as it cures.
For handmade or irregular tiles, larger joints are almost always the better choice. Size variation from tile to tile becomes far more noticeable with tight joints, and a wider joint gives the eye a visual buffer that makes the layout look intentional rather than uneven.
Installation best practices for joint sizing:
- Match joint width to tile type: rectified tiles can use 1/8 inch; handmade tiles need 3/16 inch or wider
- For floor installations, slightly wider joints improve traction in wet areas
- Account for corner joints, which open up as grout cures, and recessed joints, which narrow at the top
- Never use unsanded grout in joints wider than 1/8 inch, regardless of what the packaging claims about flexibility
Why grout release matters more than most people realize
Grout release is a water-soluble protective coating applied to tile surfaces before grouting with dark or pigmented grout. It creates a barrier between the tile face and the grout, making cleanup easier and, more critically, preventing permanent staining during installation. Omitting grout release when using dark grout on light tiles is one of the most costly installation mistakes you can make. The pigment can absorb into porous tile surfaces and glazes with crazing or crackle finishes, and no amount of cleaning will fully remove it after the fact.
Curing, timing, and environmental factors
Grout needs adequate time to cure before it's exposed to moisture or foot traffic. Rushing this step leads to weak joints that crack or crumble prematurely. Temperature and humidity affect cure time: cold or very humid conditions slow the process, while hot, dry conditions can cause cement-based grout to cure too fast and crack.
For indoor versus outdoor applications, the stakes are higher outside. Outdoor grout faces freeze-thaw cycles, UV exposure, and greater thermal movement. Polymer-modified or epoxy grout handles these conditions better than standard cement grout. VOC content matters more in enclosed indoor spaces: look for low-VOC or zero-VOC formulas for bathrooms, kitchens, and any space with limited ventilation.
Installation best practices:
- Allow cement-based grout to cure for at least 72 hours before sealing
- Keep the installation area at a stable temperature during curing
- Apply grout release before any dark or pigmented grout on light or porous tiles
- Remove grout haze from tile faces within the manufacturer's recommended window, before it hardens
- For outdoor installations, choose polymer-modified or epoxy grout rated for exterior use
How do you keep grout looking good for the long term?
Properly maintained sealed grout lasts over 15 years. Neglected grout fails in 3–5 years. That gap comes down almost entirely to a consistent maintenance routine, and the routine itself isn't complicated.
The most common grout maintenance mistakes are using acidic or bleach-based cleaners, failing to squeegee shower walls after use, and skipping annual resealing. Acidic cleaners, including vinegar and many commercial bathroom sprays, break down the cement binder in grout over time. Bleach weakens the surface and makes it more porous, which accelerates staining. These are the exact behaviors that turn a 15-year grout job into a 4-year replacement.
A practical maintenance schedule:
- Daily: Wipe down shower walls and squeegee surfaces after use to remove standing water
- Weekly: Clean with a pH-neutral cleaner and a soft-bristle brush or microfiber cloth
- Quarterly: Inspect grout lines for cracks, discoloration, or areas where the sealer has worn through
- Annually: Reseal cement-based grout after a thorough deep clean
One thing most DIY homeowners get wrong: scrubbing harder when grout looks dirty. Harsh scrubbing damages the protective surface of the grout, making it more porous and prone to staining going forward. Letting a pH-neutral cleaner dwell on the surface for several minutes before gently agitating it is more effective and far gentler on the grout. For stubborn stains, a soft brush and adequate dwell time will outperform aggressive scrubbing every time.
Sealing rules worth knowing:
- Epoxy grout and certain polymer-modified grouts are non-porous and don't require sealing. Applying a traditional sealer to them wastes time and can leave a tacky residue that attracts dirt.
- For cement-based grout, always deep-clean and rinse thoroughly before sealing. Applying sealer over grout contaminated with soap residue or cleaning agents causes poor bonding and early sealer failure, leading to discoloration or peeling.
- Penetrating sealers soak into the grout and create an internal barrier. Membrane sealers sit on top and can trap moisture underneath as they age.
For step-by-step grout repair when cracks or damage appear:
- Score and remove the damaged grout with a grout saw or oscillating tool, clearing at least 2/3 of the joint depth
- Vacuum out all dust and debris
- Apply grout release to adjacent tile faces if using pigmented grout
- Mix fresh grout to the correct consistency and press it firmly into the joint with a grout float
- Smooth the surface and wipe excess with a damp sponge before it hardens
- Allow full cure time before sealing, typically 72 hours for cement-based grout
For high-traffic areas like entryways and commercial kitchens, the grout cleaning guide for high-traffic areas covers additional techniques for maintaining grout under heavier daily wear.
Why eco-friendly grout care is worth switching to
Conventional grout cleaners often rely on acids, bleach, or harsh solvents to cut through grime fast. They work in the short term, but they degrade grout faster than the grime they're removing. The case for plant-based, low-VOC, biodegradable cleaners isn't just environmental. It's practical: gentler chemistry preserves the grout surface longer, which means less frequent resealing and fewer repairs.
For homes with children, pets, or anyone with respiratory sensitivities, low-VOC products reduce airborne chemical exposure during and after cleaning. In pool areas and outdoor stone surfaces, biodegradable formulas break down without leaving residues that can affect water chemistry or harm surrounding vegetation.
What to look for in an eco-friendly grout care routine:
- pH-neutral, plant-based cleaners that lift grime without attacking the cement binder or sealer
- Acid-free formulas safe for natural stone, grout, and pool tile surfaces
- Biodegradable ingredients that don't accumulate in drains or affect pool water chemistry
- Low or zero VOC content for use in enclosed spaces like bathrooms and kitchens
- Non-toxic sealers that provide penetrating protection without off-gassing during application
Oceancarestore's product line is built around exactly these principles: plant-based, acid-free cleaners and low-VOC sealers designed for grout, natural stone, and pool tile. Their stone and grout sealers offer penetrating protection without the harsh chemistry that shortens grout life. For homeowners who want a full picture of eco-friendly grout maintenance routines, Oceancarestore's blog covers the complete approach from cleaning frequency to sealer selection.
Pro Tip: After cleaning grout with any product, rinse thoroughly with clean water before the surface dries. Residue from even mild cleaners can interfere with sealer adhesion and cause the sealer to peel or cloud within months.
Oceancarestore's eco-friendly cleaners and sealers are formulated to protect grout, pool tile, and natural stone without compromising the surfaces or the people living around them. Browse the pool tile restorer and grout sealer range to find the right product for your next project.
Key Takeaways
Choosing the right grout type and maintaining it consistently is the single most important factor in how long your tile installation lasts and how good it looks over time.
| Point | Details |
|---|---|
| Match grout type to joint width | Sanded grout for joints over 1/8 inch; unsanded for joints between 1/16 and 1/8 inch. |
| Epoxy grout needs no sealing | Epoxy is non-porous; applying traditional sealers to it wastes time and creates tacky residue. |
| Sealed grout lasts over 15 years | Neglected grout fails in 3–5 years; a consistent maintenance schedule prevents most problems. |
| Grout release prevents permanent staining | Always apply grout release before using dark or pigmented grout on light or porous tiles. |
| Avoid acidic and bleach-based cleaners | These degrade the cement binder over time; pH-neutral cleaners preserve grout integrity longer. |

