
What Is Stone Etching? Techniques for Artisans
TL;DR:
- Stone etching involves creating permanent designs on stone surfaces through manual or laser methods that physically or chemically modify the material. The choice of technique and stone type depends on the desired detail, durability, and craftsmanship level, with softer stones suitable for beginners and harder stones requiring advanced skills or equipment. Proper surface preparation, testing, sealing, and ongoing maintenance are essential for achieving lasting, high-quality etched stone artwork.
Stone etching is defined as the process of creating permanent designs on stone surfaces by physically or chemically altering the material. This craft spans two main approaches: traditional manual engraving using rotary tools fitted with diamond or tungsten carbide bits, and modern laser etching that uses focused beams to vaporize stone with precision. Materials like granite, marble, limestone, sandstone, and slate each respond differently to the stone engraving process. Whether you are decorating a garden patio, personalizing a memorial, or producing fine art, understanding what is stone etching gives you the foundation to choose the right method and tools from the start.
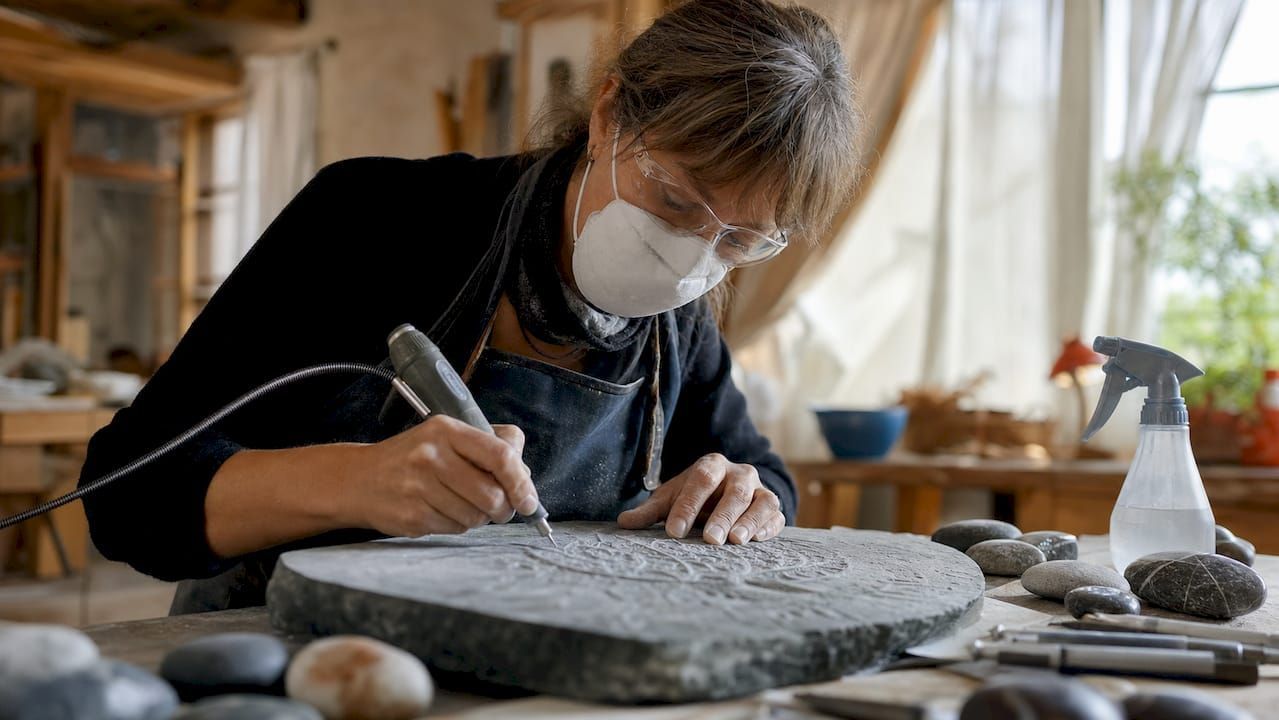
What are the main stone etching techniques used today?
Stone etching techniques fall into two clear categories: manual engraving and laser etching. Each produces distinct results, and the right choice depends on your skill level, budget, and the type of design you want to achieve.
Manual engraving
Manual engraving is the older of the two methods. You use a rotary tool such as a Dremel fitted with diamond or tungsten carbide bits to physically grind away the stone surface. Manual stone engraving requires careful surface preparation, slow steady hand movement, and medium tool speeds to prevent overheating the bit. The result is a tactile, handcrafted look that many artists and collectors prize for its raw, organic quality.
Key considerations for manual engraving:
- Use diamond bits for hard stones like granite and tungsten carbide bits for softer materials like sandstone
- Work at medium speed to avoid burning the bit or cracking the stone
- Keep a damp cloth nearby to wipe dust and improve line visibility
- Sand the surface lightly before starting to improve detail retention
- Work in short sessions to maintain precision and reduce fatigue
Pro Tip: Water cooling during engraving prevents bit overheating and reduces micro-cracking in the stone. A simple spray bottle of water or a wet sponge nearby is enough for most home setups.
Laser etching
Laser etching on stone uses focused laser beams to vaporize the surface layer, producing intricate, repeatable designs on granite, marble, and slate. The process is faster than manual engraving and handles complex digital artwork with ease. For deep relief textures, deep laser engraving can reach depths from 0.5 mm to over 3 mm using multiple passes and high-powered configurations, with a recommended 1064nm wavelength and 2K resolution for best results.
One critical point: increasing laser power alone does not improve etching quality. Balancing energy density, speed, and resolution is what separates clean results from burn marks or low contrast. Laser etching suits commercial production and detailed personalized work, while manual engraving remains the preferred choice for raw, handcrafted aesthetics.
How does stone type influence the etching process?
The stone you choose shapes every aspect of the engraving process, from the tools you need to the depth and contrast you can achieve. Stone hardness directly impacts tool wear and engraving clarity, so matching your stone to your skill level and equipment is the first decision to make.
| Stone Type | Hardness | Engraving Suitability | Typical Results |
|---|---|---|---|
| Sandstone | Soft | Excellent for beginners | Deep marks, rough texture |
| Limestone | Soft to medium | Good for beginners | Smooth lines, moderate contrast |
| Slate | Medium | Great for laser and manual | High contrast, clean edges |
| Marble | Medium to hard | Intermediate skill needed | Fine detail, elegant finish |
| Granite | Very hard | Advanced skill or high-power laser | Crisp, permanent, high-contrast marks |
| Basalt | Hard | Advanced skill needed | Bold marks, durable finish |
Softer stones like sandstone and limestone allow you to practice technique without wearing out expensive bits quickly. Granite demands more power, sharper bits, and greater patience. Slate sits in a sweet spot: it responds well to both manual tools and laser systems, produces strong contrast, and is forgiving enough for intermediate artisans.
Texture also matters. A polished marble surface shows fine detail beautifully but reveals every mistake. A rough sandstone surface hides small errors but limits the precision of intricate designs.
Pro Tip: Experienced artisans always start with softer stones to build muscle memory and confidence before moving to granite or basalt. Buy a few inexpensive sandstone tiles and practice your full design before committing to premium material.
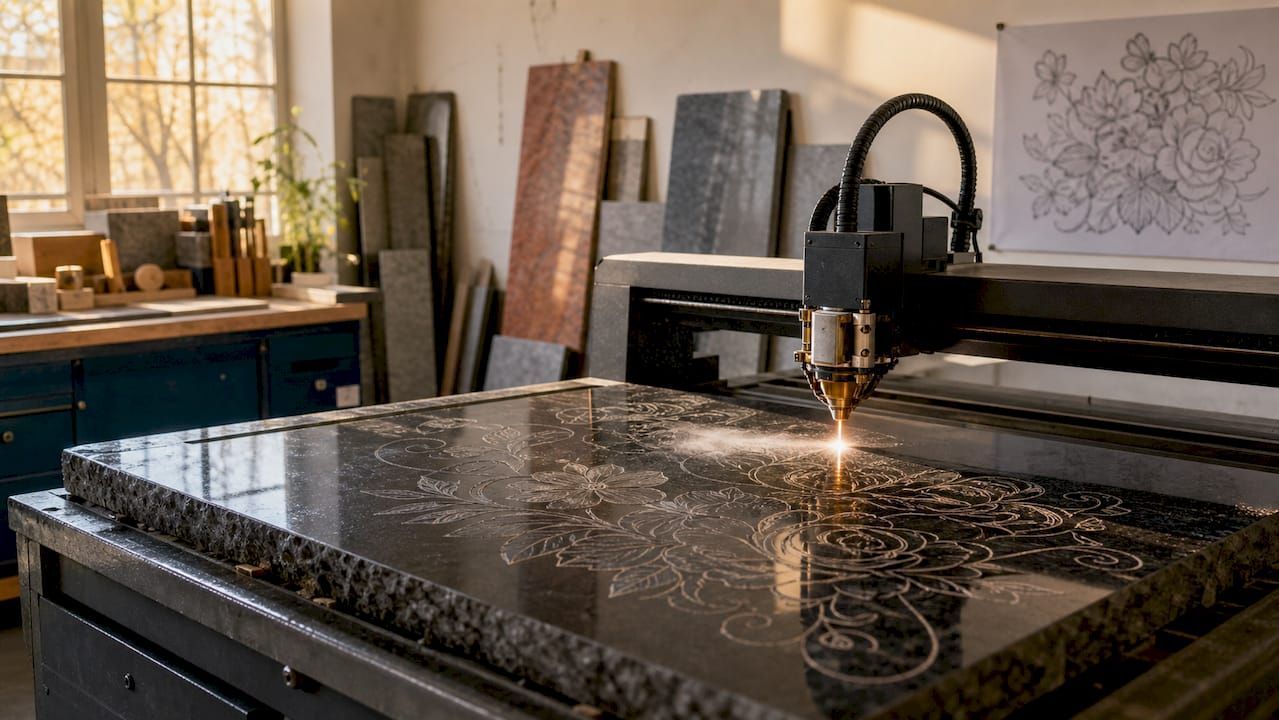
How to prepare and execute a stone etching project
Good preparation separates a clean, lasting piece from a frustrating failure. Follow these steps for both manual and laser projects:
- Clean the stone surface. Remove all dirt, oil, and residue using a pH-neutral stone cleaner. Any contamination affects how the tool or laser interacts with the surface. For outdoor stones, check out eco-friendly stone cleaning methods that protect the material without harsh acids.
- Sand and smooth the surface. For manual engraving, fine sanding improves detail retention and reduces chipping at the edges of your marks. Skip this step on naturally textured stones where the rough surface is part of the design.
- Transfer your design. Use a printed stencil taped to the stone for manual work. For laser etching, import your digital file directly into the laser software. For freehand manual work, trace your design with a chalk pencil or white paint marker that wipes away cleanly after engraving.
- Test on a scrap piece first. This step is non-negotiable for laser work. Thermal management for stone engraving is critical, and overheating causes micro-fractures while too little heat produces poor contrast. Run a test pass on a matching stone scrap before touching your final piece.
- Execute the engraving. For manual work, move the tool steadily and let the bit do the work. Do not press hard. For laser work, start at lower power settings and increase gradually. Artists recommend frequent workspace cleaning during manual carving to preserve visibility and precision.
- Finish and seal the surface. Brush away all dust with a soft brush. Rinse with clean water and allow the stone to dry fully. Apply a penetrating stone sealer to protect the engraved area from moisture, staining, and weathering.
How to maintain and protect etched stone surfaces
Etched stone surfaces need consistent care to stay sharp and clean. The engraved grooves collect dust, moisture, and organic matter faster than a flat surface does. Without protection, even granite engravings can dull or stain over time.
Core maintenance practices for etched stone:
- Apply a penetrating sealer within 24 hours of finishing the engraving. A quality stone and grout sealer fills the pores around the etched area and blocks moisture intrusion.
- Clean etched surfaces with pH-neutral, acid-free cleaners only. Acidic cleaners attack marble and limestone and can widen or blur the engraved lines.
- Reapply sealer every 12–24 months for outdoor pieces exposed to rain, UV, and temperature changes.
- For indoor etched stone like countertops or decorative panels, wipe down weekly with a damp cloth and a drop of plant-based stone cleaner.
- Differentiate between etch marks and stains. An etch mark is a dull spot caused by acid reacting with the stone. A stain is a discoloration from absorbed liquid. Etch marks require natural stone restoration techniques, while stains respond to targeted cleaners.
For outdoor installations like garden stones, patios, or memorial markers, sustainable outdoor stone care practices extend the life of your work significantly. Moss and algae growth in engraved grooves is a common problem in shaded outdoor settings. A biodegradable, low-VOC cleaner removes organic growth without damaging the stone or the surrounding environment.
What applications make stone etching worth learning?
Stone etching produces results that no paint, sticker, or print can replicate. The marks are permanent, weather-resistant, and carry a weight and texture that digital media cannot match.
Decorative art and home interiors
Etched stone tiles, backsplashes, and countertops add a custom, artisan quality to kitchens and bathrooms. Marble etching with fine floral or geometric patterns is a popular choice for luxury interior design. Manual engraving gives each piece a one-of-a-kind quality, while laser systems allow consistent reproduction of the same design across multiple tiles.
Signage and memorials
Granite is the dominant material for memorial markers and architectural signage because of its durability and high contrast when engraved. Laser engraving suits commercial and detailed personalized work, making it the standard for cemetery memorials and building plaques where precision and permanence are required.
Landscaping and outdoor features
Slate stepping stones, etched garden borders, and personalized patio pavers are practical applications that combine function with artistry. Sandstone and slate work well outdoors because they hold detail well and age gracefully. Sealing is especially important for outdoor pieces to prevent freeze-thaw cycles from widening engraved lines.
Fine art and collectibles
Some artists use stone etching as a printmaking medium, pressing inked engraved stone against paper to create limited-edition prints. This connects to the older tradition of lithography, where the distinction between lithographic etching and physical engraving matters: lithography does not remove material, while physical engraving does. Knowing which process you are using determines which tools and inks apply.
Key takeaways
Stone etching produces permanent, high-contrast designs by physically altering the stone surface, and the method you choose must match both your stone type and your skill level.
| Point | Details |
|---|---|
| Two core methods | Manual engraving uses rotary tools; laser etching uses focused beams for speed and precision. |
| Stone hardness matters | Start with sandstone or limestone before progressing to granite or basalt. |
| Thermal control is critical | Test laser settings on scrap stone first to avoid micro-fractures or burn marks. |
| Sealing protects your work | Apply a penetrating stone sealer within 24 hours of finishing any etched piece. |
| Applications are broad | Stone etching suits art, signage, memorials, landscaping, and interior design equally well. |
What i have learned after years of working with stone
Stone etching rewards patience more than talent. The artisans I respect most are not the ones with the most expensive laser systems. They are the ones who spent months working through sandstone tiles before ever touching a piece of marble.
The biggest mistake I see beginners make is skipping the test run. Every batch of stone behaves slightly differently, even within the same material type. A granite slab from one quarry can respond to laser settings completely differently than a slab from another source. That 10-minute test on a scrap piece saves hours of frustration.
I also think the manual versus laser debate is overblown. They are not competing methods. They serve different purposes. If you want a production run of 50 identical memorial plaques, laser wins every time. If you want a single piece with visible tool marks and an organic feel, manual engraving produces something a laser simply cannot replicate.
My honest recommendation: learn manual engraving first. It teaches you how stone actually responds to pressure, heat, and abrasion. That knowledge makes you a better laser operator too, because you understand what is happening at the surface level rather than just adjusting software settings.
Document everything. Keep a notebook with your settings, stone types, bit types, and results. Stone etching has too many variables to rely on memory alone.
Protect your etched stone with the right products
Finishing an etched stone piece is only half the work. The right sealer and cleaner determine how long that design stays sharp, clean, and vibrant. Oceancarestore carries a full range of eco-friendly, plant-based stone and grout sealers designed to penetrate deep into stone pores and lock out moisture, staining, and weathering. These products are acid-free and low VOC, making them safe for indoor and outdoor use on granite, marble, slate, and sandstone. If you have run into issues with previous sealers, the common problems with stone sealers guide from Oceancarestore walks you through the most frequent failures and how to fix them. Protecting your work does not require harsh chemistry. It requires the right product applied correctly.
FAQ
What is stone etching in simple terms?
Stone etching is the process of creating permanent designs on stone by physically removing or altering the surface material using manual tools or laser beams. The result is a recessed or textured mark that is durable and weather-resistant.
What is the difference between stone etching vs carving?
Stone etching typically refers to surface-level or shallow mark-making for decorative designs, while carving involves removing larger volumes of material to create three-dimensional forms. In practice, the two terms often overlap, especially in laser engraving contexts.
What tools are needed for stone etching at home?
The core tools for stone etching at home are a rotary tool like a Dremel fitted with diamond bits, a printed stencil, a spray bottle for water cooling, and a pH-neutral stone cleaner for prep and cleanup.
Which stone is best for beginners learning how to etch stone?
Sandstone and limestone are the best starting materials because their softer composition allows clean marks with less tool pressure and causes less wear on bits. Both stones are widely available and inexpensive for practice.
Does etched stone need to be sealed?
Etched stone should always be sealed after engraving. The engraving process opens the stone's pores and increases its vulnerability to moisture, staining, and freeze-thaw damage, especially for outdoor pieces.

